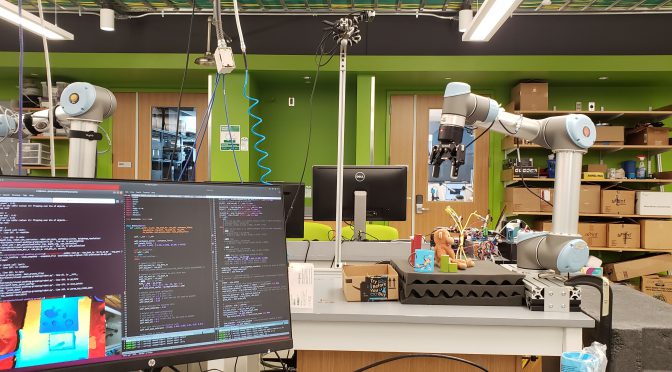
Quick note: This post is more a build log of how I got the calibration and grasping parts of the code base working, moreso than replication of the results; as I am not working with the pushing part.
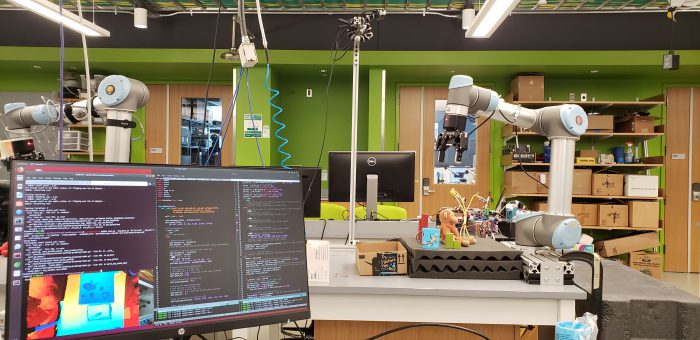
I’m working on a summer project [1] building on a project by some Princeton folks called TossingBot. The idea is nice: combine a simple physics model with a network that learns a residual to add (or subtract) onto the single control parameter (thrown velocity), in order to toss arbitrary objects into a desired bin.
Anyway, although the code for the tossing bot paper is not available yet, the same authors released a nice, well commented / documented code repository for their earlier paper, the visual pushing and grasping paper. (I guess, it seemed like they completed part of it during a google internship, so I feel better that I’m being paid far less and cannot spend much time on releasing quality code).
And I actually got it to work! Wow, replicable work. Okay, so I didn’t get it to work in full — but I do have a vastly simplified version of their code working on my ur5, with a d415 camera, and a different gripper — and by using their pre-trained model out of the box! It outputs grasp predictions, and the ur5 moves to different locations where there are actually objects, picks them up, and then drops them.
I had to solve a few issues to get to this point, so I’ll outline here and explain in more detail later (hopefully — again time is short). Perhaps the most broadly applicable is my understanding of their calibration code.
Relevant links:
https://tossingbot.cs.princeton.edu/
http://vpg.cs.princeton.edu/
https://github.com/andyzeng/visual-pushing-grasping
What I did the last 10 days:
SOFTWARE
- Installed 18.04.1 on the lab computer
- Installed ROS — This is actually not needed for the VPG code, which has removed ROS as a dependency
Re: ROS, I also learned a hard lesson — checkout the right branch for your ROS packages. e.g. Kinetic Karma or Melodic whatever. Otherwise will get a ton of errors.
GRIPPER
I used a different gripper than the one used in the paper, so I needed to rewrite portions of the code.
1. Attached robotiq gripper to the robot arm, and got it functional.
1a. Required low profile screws of a short length (8mm) that I couldn’t find in the lab at first.
1b. Got it working directly with the teach pendant.
1b. There is a serial to USB converter which for me happened to be inside the ur5 control box. I unplugged that and plugged it into my desktop (presumably, you could control the gripper directly from the ur5 interface when it’s plugged into the ur5 usb ports).
1c. Got it working with ROS. To be hones, this was a majoorrr pain. I kept getting all sorts of weird errors.
ow, instead, I talk to it directly in python, bypassing ROS entirely. Read the robotiq manuals which give a clear command example.
Relevant links:
https://blog.robotiq.com/controlling-the-robotiq-2f-gripper-with-modbus-commands-in-python
(mostly, just something like `ser.write(“\x09\x03\x07\xD0\x00\x03\x04\x0E”)` )
REALSENSE
Due to using a different version of Ubuntu, I had to a bit of experimenting to install the realsense drivers (which are from Intel, and separate from the VPG codebase).
First off, I had a Realsense D435, and opted to buy a D415 as in the paper, since the D415 is better for static scenarios where precision is more important. And it does seem to perform a lot better on the tabletop by default.
1. Attempted to install realsense-viewer on my ubuntu 19.10 install. Apparently the deb install only works with a much older version of the linux kernel — thus, started patching things and compiling from source. Did things like patch the patches, since the patches were for 18.04.2 and not… 19.10… I did get it working, but my main lesson was to install 18.04.1 on the ur5 desktop.
Relevant links:
- Debug log http://orangenarwhals.com/hexblog/2019/06/11/realsense/
- Start here https://github.com/IntelRealSense/librealsense/blob/development/doc/distribution_linux.md
- Fail, start to compile from source https://github.com/IntelRealSense/librealsense/blob/development/doc/installation.md
- See patch script files https://raw.githubusercontent.com/leggedrobotics/librealsense/7183d63720277669aaa540fba94b145c03d864cf/scripts/patch-ubuntu-kernel-4.18.sh
I did also switch from the D435 to the D415 out of a desire to change as little as possible from their setup. (Also, on the Intel website I read that the D435 is better for detecting motion and D415 better for static setups).
UR5
1. Plugged it in
1b. Major lesson: Pendant shows coordinates, the ones in VIEW are different the ones which are reported over serial / you send via python. Have to use dropdown to select BASE.
Additionally, there are two ways to specify configurations which can not be directly mixed and matched. joint config = angle of each of the 6 joints. And the other one is the coordinates (which presumably ur5 has a built-in IK solver and path planner to move to), but note that the final tool position is in axis-angle coordinates, not in rotation of each joint!!! This was super confusing to debug.
2. Learned to use ROS ur_modern_driver and get test_move.py working; ignore the other package — eventually, did not use this since codebase did not need ROS
VPG code
The calibration program outputs the pose of the camera, with which we can transform (shear, rotate, etc.) the acquired depth image into a “birds eye” depth image view.
I learned: use python-urx for debugging (due to upgrade of UR5 firmware itself, from universal robots, the serial communication code of VPG is a bit flaky). The calibrate.py parameters specify checkerboard offset from “tool center” which is defined by the UR5 (by default middle of the outward face of last joint). I documented my work in this github issue. Use the teach pendant to set workspace limits. Use foam to offset z height from table for safety purposes.
Calibration — as copied from github issue —
I’m not sure this is correct, but:
- Using the pendant, the limits are the X, Y, Z as displayed under the “TCP” box (it is displayed in mm; the code is in meters).
e.g.
[[0.4, 0.75], [-0.25, 0.15], [-0.2 + 0.4, -0.1 + 0.4]])  [1]
[minx, max x], [miny, max y], [minz, max z]
- This is also just experimentally measured. I’m least certain on this part, but I think it is what the tool would need to do to move to the checkerboard center. So if it needs to move +20cm X – 0.01cm Z to the center of the checkerboard.
Presumably the tool center = the middle area of the gripper fingers.
EDIT: Wow not sure what I was thinking, but it’s to the “tool center” of the robot (what is reported on the pendant / over TCP from the UR). And as to the sign of the offset — it’s really checkerboard_pos = tool_pos + offset, so define the offset appropriately. Well, that’s my current belief based on inspecting the code, but maybe I will update the belief tomorrow, who knows. end edit
The readme implies this calibration isn’t so important if you’re using the Intel D415 realsense. For what it’s worth the format of the files is (ignore the actual values)
EDIT: Yup, changed my mind. The calibration actual provides the pose of the camera relative to the robot frame. In this way, the image from the camera, which may be looking at the workspace from the side or at an angle, can be morphed/transformed so that the image is from a perfectly “birds eye” camera. end edit
—
Also, for starting out, a blank file named camera_depth_scale.txt will suffice to kill errors preventing code run.
real/camera_depth_scale.txt
1.012695312500000000e+00
real/camera_pose.txt
9.968040993643140224e-01 -1.695732684590832429e-02 -7.806431039047095899e-02 6.748152280106306522e-01
5.533242197034894325e-03 -9.602075096454146808e-01 2.792327374276499796e-01 -3.416026459607500732e-01
-7.969297786685919371e-02 -2.787722860809356273e-01 -9.570449528584960008e-01 6.668261082482905833e-01
0.000000000000000000e+00 0.000000000000000000e+00 0.000000000000000000e+00 1.000000000000000000e+00
- Any 4×4 checkerboard will work. I used some online checkerboard generator and then printed it out. e.g. here is one

[1] Note that it’s possible the pendant display somehow differs from the actual TCP values — my z-values were 0.07 on the pendant corresponding to 0.47 in python; to debug, can use examples/simple.py https://github.com/SintefManufacturing/python-urx
And more rambling thoughts:
I mostly fussed around with the calibrate.py script for a long time, an entire 1-2 days wasted on the fact that I didn’t realize the pendant coordinates were off by 40 cm on the z axis, so combined with the joint config vs position specification issue, I was confused why the robot was constantly trying to go through the table. I suspected it was something like the z axis issue, but really it was using this library to get the pose out
https://github.com/SintefManufacturing/python-urx/
(such a great library!) that helped me figure it out.
Additionally, the tool offset I wasn’t certain how it worked, until I opened the code. I thought it was literally to where I wanted on the gripper to be the centerpoint, but no, it’s literally to what the UR5 thinks is the centerpoint of its tool, which is what it reports the coordinates of.
I’m currently still having some z-depth issues, so trying to work through the very detailed! parameters given in the paper to see what is going on with that.
USB extension cable — USB 3.0 is quite strange. I spent a long time figuring out that my extension cable looks like a USB 3 cable (blue ends, extra pins) but was behaving as a USB 2.0 extension cable… ordered some off of amazon that did the trick (also lsusb -t was very helpful).
Home position —
It seems that
Here’s a video of what it’s doing for now (I’ll rehost onto youtube for longevity when I get the chance)
https://photos.app.goo.gl/r6vtjPbjLJECjzPd6
And a more exciting dynamic maneuver
And pictures
Yesterday, when it was kinda working
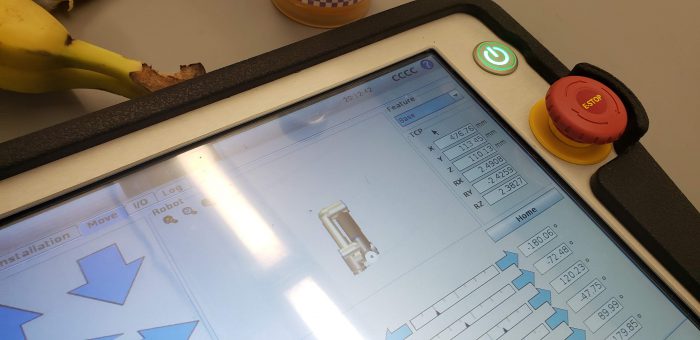 Hey look, I selected BASE. T__T
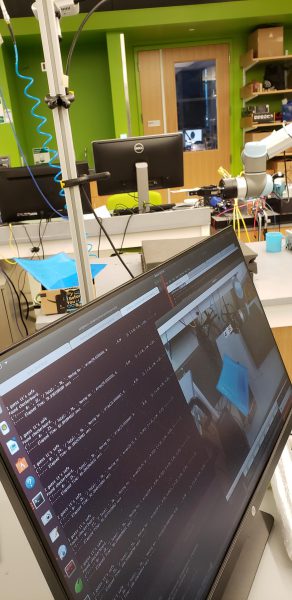
Calibration in progress. With some limits to the movel command, punctuated by “I guess it’s safe *shrug*:
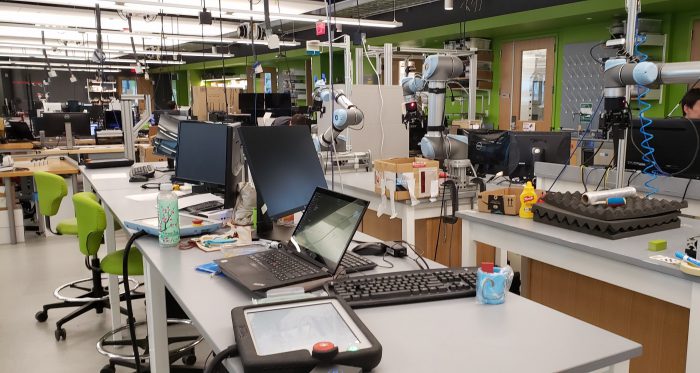
And a blurry picture of my lab. Had to crop out my robot a bit to avoid faces.
Until next time, folks. Hopefully I’ll have a working demo of something of my own soon. Right now, just running a mutilated version of someone else’s code. But happy to working with actual robots again.
conclusion
Okay, that was all a bit rambly. But if anyone has questions, feel free to ask away.
Foot notes:
As to my motivation, I’m working on a small summer research project, which I will detail if I end up getting it working in full.
The idea is heavily based off of the tossing bot paper, as I liked the idea of combining a physics baseline with learning of the error (the residuals).
My requirements were:
1. can be finished in 3 months starting from scratch
2. has cool demo (to, for instance, a 10 year old maker faire attendee) — so probably something dynamic, movement-wise
3. research worthy, since my qualification trials are at the end of the summer.
I think I’ll struggle most with the last point, but I’m hoping that in the process of working toward my goal, I’ll think of something that could be tweaked or improved.

