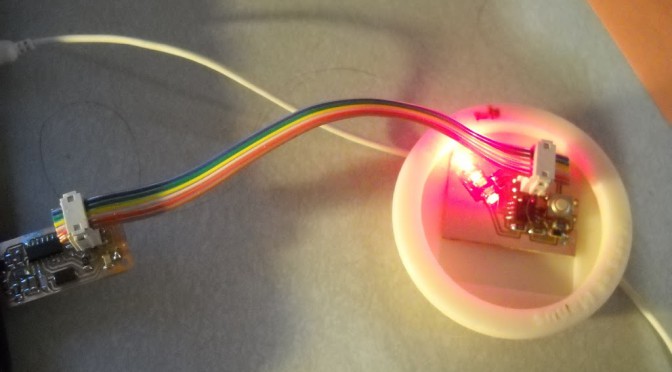
[Edit: solved, the error was in the fab hello world makefile line
$(OBJCOPY) -j .text -O ihex $(PROJECT).out $(PROJECT).hex
To fix, add -j data or drop the -j option altogether)
See http://www.micahcarrick.com/avr-tutorial-digital-output.html. also, man avr-objcopy.
What was actually happening was in one example the compiler replaces the code with the array data and then loads it into the microcontroller, while for the other example it loads the compiled code into the micro, and in both cases the constant array never makes it into the microcontroller.]
The surface symptoms of crazy compiler bug which appears to eat variables (NOT an optimization issue! — check out this awesome thread for more about that http://www.avrfreaks.net/index.php?name=PNphpBB2&file=viewtopic&t=97382 )
Me: I’m getting bugs where the exact symptom in simplest form is
=========
void light_led(char led_num) {
DDRB = led_dir[2];
PORTB = led_out[2];
}
void main(void) {
while (1) {
light_led(2); //obviously I am ignoring the argument given here
}
}
=========
works as expected but
=========
void light_led(char led_num) {
DDRB = led_dir[led_num];
PORTB = led_out[2];
}
void main(void) {
while (1) {
light_led(2);
}
}
=========
doesn’t. (tested and doesn’t work: char, volatile char, int and now int8_t and uint8_t).
Based on this code: https://github.com/benbrandt22/TinyLife5/blob/master/TinyLife5.c
(full file here: https://github.com/nouyang/pov-yoyo/blob/master/v0.1.45.c)
Yes, I tried int instead if char in case C arrays wanted int indices. And volatile char in case the compiler was like “You, variable! You are a useless waste of memory. OPTIMIZED.” (sfx notes: that should sound like RECTIFIED in Tron).
Okay, so why doesn’t AVR Studio 5 Debugger work?
Turned out AVR Studio debugger is straightforward, but it doesn’t work if you have a
void main (void) {}
function instead of a
int main … (return 0; )
function.
Also, AVR Studio 5 is amazing. I can peer at all the DDRB and PORTB and all the pins — even with an oscilloscope I would need like 8 arms to do this.
Oh right, back from worshiping AVR for making AVR Studio freely available (the Gobsmacking Glory of which is only slightly diminished by my sadness that it’s not open-source / doesn’t run on linux (haven’t tried WINE yet)) and on to compiler issues.
Re: linux avr toolchains, Pranjal Vachaspati, hallmate and 2014, in yet-another-spam-thread-I-started, writes:
If you’re using AVR eclipse (and I strongly recommend you do, as AVR development has way too many steps to comfortably manage manually), make sure you change the build target from “Debug” to “Release” or else it won’t create the appropriate binary. Also if you’re not using AVR eclipse it’s awesome! http://avr-eclipse.sourceforge.net/wiki/index.php/The_AVR_Eclipse_Plugin
In the meantime, I will continue my terrifying toolchain of Desktop > AVR Studio > Compile > attach *.hex file to email > Netbook > download file > run avrdude > Debug in AVR studio > … =/ Maybe AVR Studio works with Wine.
I grabbed the avr-gcc commands from the terminal output at the bottom of AVR Studio 5, edited the filenames, and used it to compile C code on ubuntu. (Note that choosing “Release” uses -Os, full optimization, while choosing “Debug” uses -O0, no optimization. For my code this results in 3 kilobytes flashed versus 150 bytes! — 3kb = almost 90% of available mem on attiny45)
I’m writing some C code for the attiny45 microcontroller for how to make anything, and I’m debugging a problem where for the exact same C code, AVR Studio creates a happy .hex file but the class-derived makefile creates a “I’m-going-to-half-work-and-drive-you-crazy-debugging” .hex file (see C code above for the symptoms).
~~~AVR Studio commands
avr-gcc -funsigned-char -funsigned-bitfields -Os -fpack-struct -fshort-enums -g2 -Wall -c -std=gnu99 -mmcu=attiny45 -MD -MP -MF”v0.1.45.d” -MT”v0.1.45.d” -o”v0.1.45.o” “v0.1.45.c”
avr-gcc -mmcu=attiny45 -Wl,-Map=v0.1.45.map -o v0.1.45.elf v0.1.45.o
avr-objcopy -O ihex -R .eeprom -R .fuse -R .lock -R .signature “v0.1.45.elf” “v0.1.45.hex”
avr-objdump -h -S “v0.1.45.elf” > “v0.1.45.lss”
avr-objcopy -j .eeprom –set-section-flags=.eeprom=alloc,load –change-section-lma .eeprom=0 –no-change-warnings -O ihex “v0.1.45.elf” “v0.1.45.eep” || exit 0
avrdude -p t45 -c usbtiny -U flash:w:v01.45.hex
~Results as run on Ubuntu 11.10 in 435 bytes .hex file / 146 bytes flashed. And results in a bunch of magical files.
~~~Class-derived Makefile
avr-gcc -mmcu=attiny45 -Wall -Os -DF_CPU=8000000 -I./ -o ./v0.1.45.out ./v0.1.45.c
avr-objcopy -j .text -O ihex ./v0.1.45.out ./v0.1.45.c.hex;
avr-size –mcu=attiny45 –format=avr ./v0.1.45.out
avrdude -p t45 -c usbtiny -U flash:w:v0.1.45.c.hex
~Results as run on Ubuntu 11.10 in 443 bytes .hex file / 150 bytes flashed. (it takes up more memory and it doesn’t work right! :/)
So, I emailed out to the MAS.863 and one of the TAs promptly spent almost an hour writing an essay in reply. o__o Yay awesome people. Directly copied:
Brian Mayton (bmayton):
Here’s what some of this means. First, starting with the compiler command (avr-gcc).
> avr-gcc -funsigned-char -funsigned-bitfields -fpack-struct -fshort-enums
The -f options change the behavior of the compiler. -funsigned-char tells it that the ‘char’ type is by default unsigned (that is, cannot represent negative numbers, but can store numbers twice as large.) Normally in C ‘char’ is signed, and if you want an unsigned one you have to say ‘unsigned char’. This flag swaps it around, so that ‘char’ is unsigned by default and you have to say ‘signed char’ if you want a signed one. Generally, when writing microcontroller code, I very much prefer to be explicit, never assuming what the compiler is going to do. <stdint.h> is part of the C standard library and defines types like ‘uint8_t’ (an unsigned 8-bit integer, same as ‘unsigned char’) and ‘int8_t’ (a signed 8-bit integer, same as ‘signed char.’) I prefer these over the char, short, int, long types because I know exactly what I’m getting.
-funsigned-bitfields says that bitfields are also unsigned. If you don’t know what bitfields are, you’re probably not using them. (Most code for avr-gcc doesn’t use them.)
-fpack-struct says that all structs should be packed. (Look up C structs if you’re not sure what these are.) On some processor architectures, memory is addressed a ‘word’ at a time—on a 32-bit x86 processor, for example, a word is 32 bits (or four bytes) long. The instructions for accessing a word of memory tend to be faster when the word being accessed is ‘aligned’ to a word boundary, i.e. its address in memory is a multiple of four bytes. In a struct, if you were to have, for example, three fields that were each one byte long (uint8_t), and then one field that was four bytes long (uint32_t), and the beginning of the struct is aligned to a word boundary, then the 32-bit variable won’t be, and accessing it will be slower than if it were. So sometimes the compiler will insert ‘padding’ to make sure that all multi-byte fields in a struct are aligned to word boundaries; in this case, it might insert one byte of padding in between our three single-byte variables and the four-byte variable to push it over onto the word boundary. Telling the compiler that a struct should be ‘packed’ tells it *not* to insert this padding. On a microcontroller with limited memory, you might prefer the slower access to unaligned fields to the ‘wasted’ memory that padding creates, or if you’re implementing a network protocol that needs the fields to be at specific locations.
-fshort-enums tells the compiler that enums (again, look this up if you don’t know what they are) should be stored as a ‘short’ rather than an ‘int’.
My guess is that it’s likely one of the above flags that makes your code work, but without seeing your code I couldn’t say for sure.
> -Os
This sets the optimization level. -Os means that the compiler should optimize to make things faster, but try to produce the smallest program possible. -O0 means don’t optimize, -O1 means some optimizations, -O2 enables more optimizations, and -O3 turns on optimizations that might also result in a larger program. http://www.avrfreaks.net/index.php?name=PNphpBB2&file=viewtopic&t=71862
http://www.societyofrobots.com/member_tutorials/node/207
> -g2
This tells the compiler to include debugging information in the code it generates; if you use a debugger later, it uses this information to map between which instruction in the compiled program corresponds to which line of the C files.
> -Wall
This tells the compiler to enable all warnings. There are some warnings that aren’t enabled by default (such as you defined a variable but didn’t use it, there’s nothing wrong with that, but it might be a mistake.) This can sometimes help point out programming bugs that compile fine but might not be what you meant to write.
> -c
This tells the compiler that it’s going to build an object file instead of a complete program. Object files contain compiled functions, but they’re not yet ‘linked’ together into a complete program. When you use a C compiler, one way to do it is to just give it all of your C files at once and have it produce a complete program all in one go (this is how Neil’s example Makefiles do it). In more complex programs, it’s often useful to produce the intermediate object files first, and then link them together into the complete program at the end. If you have lots of .c files, and only change one, then you only need to rebuild the .o object file corresponding to the .c file that changed. For a big project with lots of code, that can be faster.
You can read more about what ‘compiling’ and ‘linking’ mean (lots of info online) if you want to get a better understanding of what’s happening.
> -std=gnu99
This tells the compiler to use the GNU99 standard. There are a couple of different variants of C. There’s ‘ANSI C’ or C89 (the ’89’ corresponds to 1989, the year the standard was ratified.) C99 is a newer revision to the standard that adds some extra features to the language (like being able to declare varaibles at other places than the top of a block.) GNU99 adds in a handful of GCC-specific extensions.
> -mmcu=attiny45
This, of course, tells the compiler what processor to produce code for.
> -MD -MP -MF”v0.1.45.d” -MT”v0.1.45.d”
These are all dependency-tracking options, that tell the compiler to save information about which header files are used by each .c file, which can be used later to determine, if a header changes, which source files need to be rebuilt. This is useful for large projects, but not terribly useful for small microcontroller stuff.
> -o”v0.1.45.o”
This specifies the output filename. Usually the convention for object files is whatever the name of the .c file was, but with .o instead.
> “v0.1.45.c”
And finally, this is the .c file to compile. And that’s it for the compilation step. If you had multiple .c files in the program, this would be repeated for each one.
Now, the linking step:
> avr-gcc -mmcu=attiny45 -Wl,-Map=v0.1.45.map -o v0.1.45.elf v0.1.45.o
This also uses the avr-gcc command, but since there’s no -c flag, it’s going to build a complete program instead. The linker will take all of the object files (in this case, only one) and assemble them together into a complete program, figuring out where everything fits in memory. The object files have ‘notes’ in them that say things like ‘here I want to call function foo()’; it’s the linker’s job to decide where function ‘foo()’ is actually going to be in memory, and replace that ‘note’ with the actual address for the program to jump to. The -Wl,-Map= flag tells the linker to also produce a file that says where it’s putting things, which can be helpful to reference when debugging sometimes.
The -o flag, like before, specifies the output file; for a complete program, this will be in ‘elf’ format. (This is a standard format for executable programs, you can read more about it if you want.) Finally, a list of all of the .o files to include in the program follows (in this case, again, we only have the one.)
Now some objcopy/objdump stuff:
> avr-objcopy -O ihex -R .eeprom -R .fuse -R .lock -R .signature “v0.1.45.elf” “v0.1.45.hex”
Mostly for historical reasons, a lot of programming tools won’t read an elf file directly. Customarily, the file format that’s used is Intel HEX (ihex, or simply .hex.) (Some embedded systems also use Motorola S-record or srec files). The objcopy command here is basically copying the compiled code from the elf file into a hex file. It’s told (via the -R flags) to ignore the .eeprom, .fuse, .lock, and .signature sections (so this hex file will basically only contain the program code, or the .text (in executable parlance, ‘text’ often means compiled code) section.)
> avr-objdump -h -S “v0.1.45.elf” > “v0.1.45.lss”
objdump here is generating a file with the disassembly listing of the compiled program. This is completely unnecessary to generating working code, but sometimes looking at the disassembled program to see what instructions the compiler generated can be a useful debugging tool.
> avr-objcopy -j .eeprom –set-section-flags=.eeprom=alloc,load –change-section-lma .eeprom=0 –no-change-warnings -O ihex “v0.1.45.elf” “v0.1.45.eep” || exit 0
Finally, this is creating another hex file that would contain any ‘.eeprom’ section you defined in your program. You’re quite likely not using the EEPROM on the chip, and don’t need this.
That ended up being a bit long-winded and I went off on a few tangents, but maybe that helps a little?
Also, perhaps the reason why avr-gcc install with neither manpages nor info files is the length of the avr-gcc manual: http://linux.die.net/man/1/avr-gcc
=====
Then my email to my hall course-6 list sidetracked into a rant about makefiles. The main takeaway was that to learn about makefiles I should read the GNU Make manual.
http://www.gnu.org/software/make/manual/make.html
Here’s the gist of the email thread, if it’s interesting to others:
Marti Bolivar (of leaflabs! http://leaflabs.com/ yay open source hardware startups):
if at any point, you find the experience of writing a nontrivial
makefile akin to swimming upstream in a river of tepid molasses, don’t
despair. that is the expected behavior. make sucks, that’s life :(.
if your class requirements don’t forbid it, you may wish to try scons
(http://www.scons.org/) out.
RJ Ryan (of open-source DJ software mixxx http://www.mixxx.org/ and mobile health Sana Mobile http://sana.mit.edu/) says:
SCons is good for projects where everyone knows Python. If nobody knows Python, it’s a really terrible idea. 🙂 Just look at Mixxx’s SConstructs. I’ve attempted to bring some sanity to them, but they’re mostly crap.
And that’s only like 70% of the SCons files we have. After dealing with this long enough, I coined this addage: Give a person a turing-complete build system and they will find a way to club a baby seal.
In my experience, you have two options if you are stuck with make:
1) Spend years learning by example and eventually understand most of what is going on but still be utterly confused 10% of the time (e.g. dealing with autoconf-generated makefiles).
2) Spend a couple hours reading the GNU make manual straight through. Everything will make a lot more sense.
http://www.gnu.org/software/make/manual/make.html
Reid Kleckner writes:
Build systems are like the ultimate doomed project area. There are so many systems that reinvent the wheel in slightly different ways and don’t provide a bulletproof solution for everyone.
Every user has completely different requirements and is always migrating from some other system where xyz was easy, and so they just grow and grow features that make them incomprehensible at the end of the day.
Projects in this area that haven’t solved all your problems yet:
- make
- autoconf/automake
- cmake (we use this for DynamoRIO and DrMemory)
- Boost’s jam
- jom
- eclipse
- visual studio
- ninja
- scons
- rake
- BSD make
- Ant
- Maven and all the *other* Java build systems
- gyp (we use this for Chrome, go NIH)
- the new LLVM build system ddunbar proposed
It’s just… I ** hate build systems. They all suck. They’re too slow, don’t run on platform x, can’t crosscompile, mess up the deps so you have to do a clean build…
Maybe we ask too much of them.
marti picks up on the topic of turing complete baby seal clubbers:
relevant:
http://lambda-the-ultimate.org/node/85
also:
http://cmcrossroads.com/ask-mr-make/6504-learning-gnu-make-functions-with-arithmetic
that second one reminds me of duff’s quote about his device (with respect to whether fall-through was ok), “This code forms some sort of argument in that debate, but I’m not sure whether it’s for or against.”
then perry huang, some hall alum I have never met I think:
from the creator of make:
“Why the tab in column 1? Yacc was new, Lex was brand new. I hadn’t tried either, so I figured this would be a good excuse to learn. After getting myself snarled up with my first stab at Lex, I just did something simple with the pattern newline-tab. It worked, it stayed. And then a few weeks later I had a user population of about a dozen, most of them friends, and I didn’t want to screw up my embedded base. The rest, sadly, is history.”– Stuart Feldman
So yea. I’m waiting for when microcontrollers get so powerful and cheap that I can run python on them. >__> <__<


