Vending Machine Update

As per my post on open-manufacturing,
“I’m part of a student-run shop, MITERS, at my university, and we considered stocking things like breadboards and arduinos (and other emergency project materials), but that’s really not in our budget as a club. We sort of have a “if the person who knows where the secret cache and can deal with money” system set up, but I wanted to make a countertop vending machine. Used vending machines on ebay are hundreds of dollars and gigantic (we’re tight on space). I decided that the relative portability/stealibility would be fine at MITERS since everyone that comes in is a student.”
From January 13th 2013:

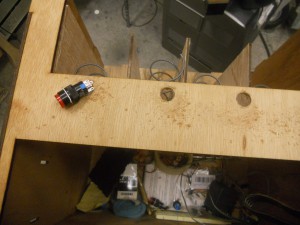
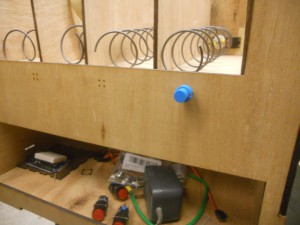
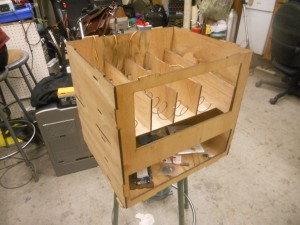
i “finished” my vending machine prototype from mas.863 all in one go, it took ~a day to find all of my supplies (i swear, i had to think like a squirrel to figure out where i buried all my microcontrollers). by finish i mean only that the dispensing aspect works without being plugged into a computer. lasercut wood, buttons and spring off the internet, servos modded to be continuous rotation, arduino uno, and a wall wart. toward the end you can see some of the issues: i made the spacings large to accommodate larger items but… it doesn’t actually work that way, etc.

Here is a video of it failing:

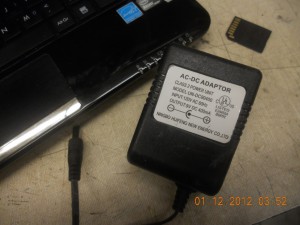
One thing I did learn is that wall warts _will_ reset your arduino uno continuously if you are trying to draw current from them.

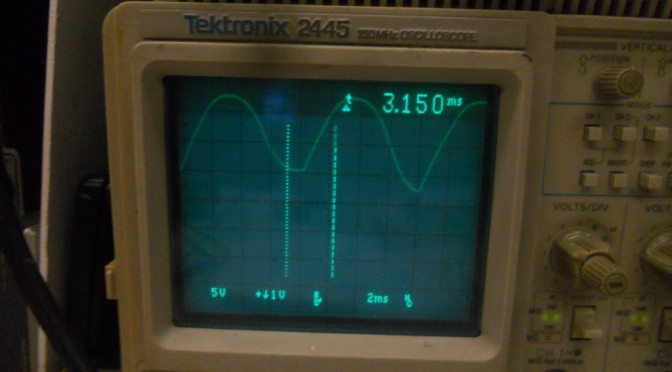
a 9V wall adapter: 5V to 23V…

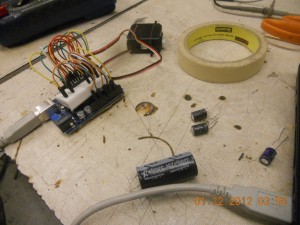
I ended up adding a giant (1000+ uF) cap to smooth out the huge voltage swing, and that solved my stranger errors. I made a short video on this topic. http://www.youtube.com/watch?v=AHoJZ-IKcRs
“300uF (not shown) may not solve your external power supply issue, but 3300uF will! 
In other words, if your arduino sketch runs on usb power but not external power (i.e. crappy wallwart), add a large smoothing cap across the rails and that might fix the issue x.x
Embarrassingly, I had this issue with a side project at my internship last summer and didn’t know how to fix it.”

In progress pics:

drill out hole to inner diameter

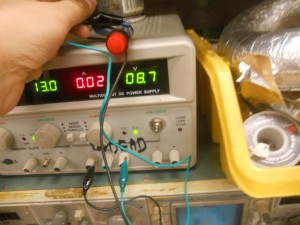
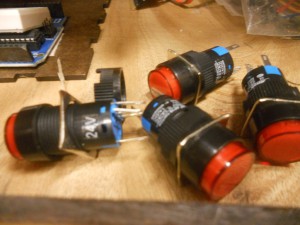
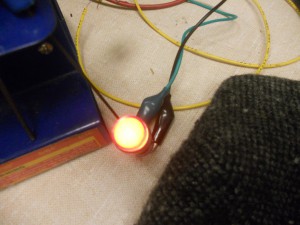
I actually got some that lit up, but only at 24V or something silly

Yea, even at 9V (I think I had a 9V wall wart) they are just barely lit up.
The buttons were from my trip to China, but nowadays you can get arcade buttons from places like sparkfun and adafruit.
The vending machine is set to be dismantled. Maybe one day I will build one from scratch.
The status of the money accepting problem, as per my post on open-manufacturing as well:
“I made this prototype (uh… keep in mind this was mostly made over 48 hrs in final project crunch mode, it was a cardboard prototype that looked like this 24 hrs earlier) but my budget was more like $50 than $200, so I got stuck figuring out how to accept payment, because you really can’t mechanically accept bills. (Maybe some sacrifice can be made where I make a bill reader that’s not $$ because it doesn’t have to check for counterfeits. But then I think something this flimsy is a bit sketchy with lots of cash in it. Hmm. I think for our own use probably an RFID reader + student ID would do the trick). It also has so many mechanical issues (but yay learning things from prototypes). “
eric hunting replied:

That laser cut box shape looks like it could be endlessly customizable. For instance, one might make a front panel with engraved graphics and extend its edges beyond the bounds of the box to accommodate any sort of decorations or stick-on sign graphics.
 It’s interesting how many vending machines today use those spiral/coil carrier mechanisms. When looking into this I found you could buy these as more-or-less generic modular units made in China that could be used in any cabinet design–though they’re still a bit expensive. So, apparently, there is more of a food chain of standardized parts for larger vending machines today akin to that of general electronics. It seems to me that the popularity of this kind of mechanism may come from its combination of greater reliability and flexibility. Vending machines with these are definitely more ‘solid state’ than those of the past and accommodate a wider variety of items in the same machine, with the ‘tuning’ between product types a matter of software/firmware. Different size item, different spacing in the coil, different number of turns to dispense. I wonder if the pro machines have modules pre-wired for a certain number of turns relative to the product size or if they are programmed by other means. The compromise, of course, is that the machines of the type tend to be rather generic in design because they’re relying on the packaging of the items to attract customers rather than design and graphics on the machine itself. The Japanese recently took a new angle on this, though, with the addition of display windows that double as touch screen displays. So the machine acts rather like a video bill-board when not in use then turns more transparent when you approach it with the window serving as a control panel for choosing items. 

===
Well, that’s all I have to say about vending machines for a long time. I need to dismantle it sometime this summer and free up my shelf space at MITERS.

Happy summer everyone!

RGB LED Graduation Cap Shenanigans, MIT Graduation Report

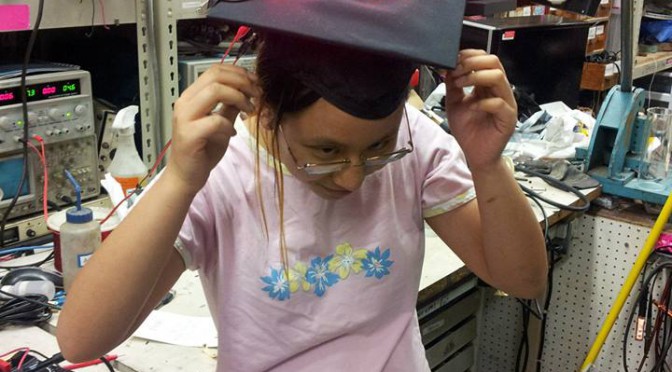
I present here my derpy graduation cap, based off of http://learn.adafruit.com/rgb-led-strips/overview:

thanks Jamison (http://thevariableconstant.blogspot.com/) for the picture!

Here it is, just finished at MITERS and still tethered to a power supply. Later I electrical taped on a lipo battery,  I kid you not.

From the front it looks normal, which is unfortunate for the graduation video, but whatever, I tried.

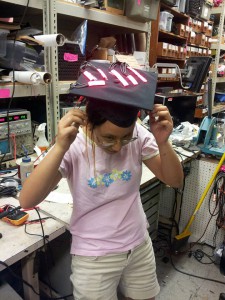
Only if you get some height above me can you see the lights.

what it looks like from the side. yea I can’t believe it got through security too, especially after Jordan‘s kawaiicopter cap that she worked on all winter break was rejected :'(

The original plan was to have a spinning RGB POV display, ala the plenitude of persistence of vision clock displays out there.

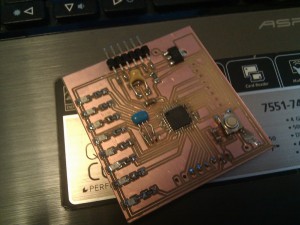
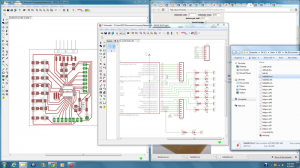
I even milled out a board for it, based on the fabduino files.

cute non-RGB 7 LED pov board

I can upload the eagle files if anyone wants, but since I haven’t gotten it to work and I can’t be sure there’s nothing wrong with the circuit I don’t want to put the effort into putting it up. This was my first exploration of the autoroute tool, which seemed to work pretty well.

Anyway after pulling two almost-all-nighters working on that project, I gave up when I couldn’t get the arduino bootloader burned onto the atmega (couldn’t get it to program at all, actually — hit a Target not found error). The cap I actually ended wearing was very simple to make and took about 6 hours total, including time spent trying to waterproof it with hot glue and saran wrap. (Most of the letters are stuck on there with the original backing tape that came on the strip). I didn’t have black wires so I used thick brown but still single core wire. I also probably should have done a 6 LED strip for the “I” and just covered up the center portion with electrical tape. Instead, I just skipped the dot on top of the “i”.

I also found this tool supppeerr useful, way more useful than the helping hands, for holding thick and relatively unyielding wires together so that I could solder them:

src: http://www.orangenarwhals.com/wp-content/uploads/2013/06/il_340x270.329862126-300×238.jpg
http://www.etsy.com/market/surgeon_tools?ref=listing_tag

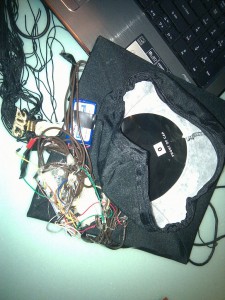
If you look carefully there are also two burn marks on my cap. I just colored the cardboard underneath with sharpie.

I also would have taken off my cap and showed it to the camera as I was coming down the ramp after getting my diploma if I knew how graduation worked.

I should have sanded down all the wires because I think a lot of the joints were cold solder joints (this bit me when I was repositioning the letters), but it worked okay and is probably the most robust of all the projects I’ve done so far because the circuit is encased in hot glue. Sorry arduino mini! (I potted that into the breadboard). The circuit itself is super straightforward, 3 FETs directly driven by the arduino. See http://learn.adafruit.com/rgb-led-strips/overview.

This is what graduation looked like for the parents.

Graduation itself was simply wet and miserable. I was on-and-off shivering by midway through and the list of names seemed endless. I’m sure they were rushing toward the end.

========================
APPENDIX: Milling circut boards on a Roland modela mill (in the IDC)
========================

Ultimate lesson learned: Make your traces at least 16 mil, 12 mil does not work!


https://github.com/radikaldesig/Arduino-POV-minimalist/blob/master/Arduino%20code/fonts.h
It’s a 5 LED font.

The fabduino I will be running (a waste to use it for just 7 LEDs, but I don’t have the time to deal with not just reusing other people’s POV code)
How to use the roland modela mill
Eagle libraries
modela@ubuntu:~/Documents/nouyang$ sh eagle-lin-6.4.0.run 
1/tmp/eagle-setup.4298/eagle-6.4.0/bin/eagle: error while loading shared libraries: libssl.so.1.0.0: cannot open shared object file: No such file or directory
ugh, let’s try troubleshooting this
sudo apt-get install libssl-dev
modela@ubuntu:~/Documents/nouyang$ lscpu
Architecture:          x86_64
CPU op-mode(s):        32-bit, 64-bit
Uhmm… okay nope. Switching back to a windows computer. A shame. : / I really ought to switch over to something more happy running on ubuntu someday.

Pin mapping
http://arduino.cc/en/Hacking/PinMapping168

FTDI headers:
DTR,

How to create board outline in eagle:
http://www.electro-tech-online.com/general-electronics-chat/31558-problem-cad-eagle-how-draw-board-space.html

Eagle MAS.863 documentation

http://fab.cba.mit.edu/classes/MIT/863.09/people/hannah/modela.html

Design rules:
http://academy.cba.mit.edu/2012/labs/providence/tutorials/07.html
http://fab.cba.mit.edu/content/processes/PCB/
http://academy.cba.mit.edu/classes/electronics_design/index.html

5V 1A regulator is in a SOT-223 package
Fab lab inventory
http://fab.cba.mit.edu/about/fab/inv.html
LM2940IMP-5.0CT-ND
http://octopart.com/datasheet/lm2940imp-5.0%2Fnopb-national+semiconductor-1009434-134675
input gnd output

hmm tangent about IC naming (78xx = vreg)
http://blog.screamingcircuits.com/2013/01/more-cautionary-tails.html

Hmmm eagle files for this vreg
https://www.sparkfun.com/products/595
gnd out in, so pin assignments are wrong, should be easy fix
https://github.com/sparkfun/SparkFun-Eagle-Libraries
https://github.com/sparkfun/SparkFun-Eagle-Libraries/blob/master/SparkFun-PowerIC.lbr
MAke sure to download zip file! OTherwise file does not download properly (adds some html comments at the beginning)
Currently the Vreg-LM1117 package is
1 ADJ
3 IN
2 OUT
4 OUT@1
which matches the datasheet https://www.sparkfun.com/datasheets/Components/FAN1117A.pdf 1:GND, 2:OUT, 3:IN.

However for the LM2940 I want
1:IN 2:GND 3:OUT

Steps ish (very incomplete)
Library>Open>Sparkfun-PowerIC
LIbrary>Device>LM1117
Connect> Disconnect all of them
Create new device

Grid dimensions in autorouting:
https://forum.sparkfun.com/viewtopic.php?p=76309

Export dpi?
http://academy.cba.mit.edu/2012/labs/providence/tutorials/07.html

then export as a png (file — export — image)
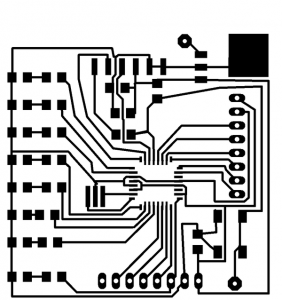
settings should be MONOCHROME and 500 DPI – this will export a image with white traces.
Make sure the color mode is set to greyscale: image > mode > greyscale
then export Dimenson layer for milling the outside of the board
Remember: the Modela cuts out the DARK and leaves white!

Correction! It should be both the top and pads layer.

http://academy.cba.mit.edu/2012/labs/providence/tutorials/install_fab_modules.html
just type in
~$ fab

… upon trying to make path:
      distance 0.800000, 140873 exterior points remain
Segmentation fault (core dumped)

must run as sudo
~$ sudo fab


Beginner’s Microquad Research: Hubsan x4, Hobbyking microquad, RC transmitter terminology, and more

Hrm, so besides ukuleles, I’ve also been doing researching into quadcopters for my startup (http://eon.businesswire.com/news/eon/20130516005905/en/accelerator/MIT/MIT-Sloan — you can guess which one is mine).

Yes, I am going to use quadcopters to teach controls. Even though I know almost nothing about quadcopters.
Well, I did fly a quadcopter for the first time last week. It was a Hubsan x4 I got for $43 including shipping off of ebay. I bought it 3/28/2013 and it arrived on 4/20/2013, and all it required was the addition of 4x AAA batteries (and an hour or so of charging) and it was all set to fly.
I bought it after reading this thread, a bit less than a year old (Jul 30 2012), which compares a ton of different microquads: http://www.rcgroups.com/forums/showthread.php?t=1701910
that’s how tiny it is. 
I also tried to fly it outside. In the grass. That was a poor plan. It was super cute, though, because first I set it down in the grass, but it couldn’t take off because it was so tiny that the props were buried in the grass. So I set it on top of a tuft of grass and it took off, but when I crash landed one of the props flew off, and I definitely had to search pretty hard to find a 1” black prop in the grass.
So I learned my lesson and now just fly it indoors, though I’m sure an empty tennis court would work fine too. It’s tiny enough that I can just fly it down the corridor of my dorm though, and stable enough that I can do this out of the box, even with minimal RC plane experience on my part. Err. But I still broke a prop (or rather my friend did, by flying it into a chair, but I had glued on the prop because it kept coming off due to an earlier crash, so I considered it partially my fault). So still out of commission until I get new props from Orlando, FL later this week.
Anyway, so the plot was to try to hack a commercial fully assembled quadcopter and write custom controls for it. I’m sure someone out there is going to read this and laugh in my face (“MIT student sets about reverse engineering Chinese quadcopter”), but whatever, it’s a fine way to learn things when you’re starting out.

” It just appeared to me why it would be interesting! If it’s an Atmega328 we’d be able to buy a dirt cheap micro quad and use our own code on it.”

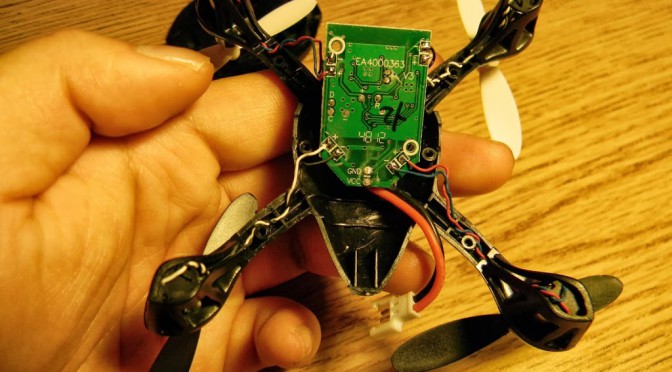
No one I asked knew about which microquads ran atmegas, though, which is the mcu (microcontroller) I am most familiar with and the one that the hobbyist community is most likely to already have written a lot of flight controller code for. The hubsan, in fact, runs a MINI54ZAN ARM controller.
zoom in the image to see the IC numbers. also, that scar on my hand? hot glue freshman year from small hexalinkagepod. kiddos, watch where that hot glue is dripping, because it can scar you. and if it drops on your hand, run cold water over it immediately.
===========
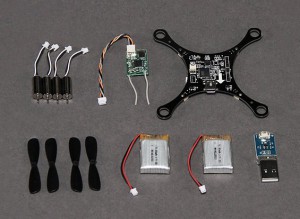
Anyway, then I realized, you know what, hobby king has sort of already done this. They made a quad that is just missing a 4ch DSM transmitter, aka it is RTF (ready to fly) minus the radio, aka it is BNF (Bind-‘N-Fly).
HobbyKing Pocket Quad Ultra-Micro DSM2 MultiWii Quadcopter (PNF)
It’s a 70mm quad with 45 mm props, whereas the hubsan x4 is 60mm body. So a bit larger. But it is “multiwii based so it’s an atmega 32U4 (the arduino Uno uses the same chip)” (says Charles), yay!
It seems that Spektra might have a license on it that makes official DSM radio controllers way more expensive than their non-DSM counterparts. Compare the 2.007 radioshttp://www.hobbyking.com/hobbyking/store/__8338__Hobby_King_2_4Ghz_4Ch_Tx_Rx_V2_Mode_2_.html, which are $23, to the DSM ones available on hobbyking, which range from $65 to $700. Seven hundred dollars! *dies* http://hobbyking.com/hobbyking/store/RC_PRODUCT_SEARCH.asp?strSearch=dsm+transmitter&x=-1197&y=-32. (source: Charles).
The other potential explanation for the price difference is power of transmitter. For real RC airplane flying outside, people will want “full-range” transmitters which are 100mW or more, while for indoors micro-quadcopter flying, especially the ones that come bundled into the ultra-cheap quadcopters like the hubsan x4, they are probably more like 10mW transmitters. (source: Shane). *
Note: I was confused about 4ch versus 5ch and 6ch transmitters. The 5th and 6th channels are usually extra buttons or knobs, e.g. for mode switching.
Anyway, so with the latter, I only need a transmitter, but I need a DSM transmitter. I was concerned at first about reusability of DSM parts, i.e. whether I could easily read the DSM receiver signals and reinterpret them to control a robot. I don’t want people to just be stuck with parts they can’t use unless they build another quadcopter or something. With the normal 2.007 radio rx/tx, I know it’s pretty easy — Sparkfun has a guide here: https://www.sparkfun.com/tutorials/348 “RC Hobby Controllers and Arduino”. According to Shane and Charles, with DSM radios it should be pretty straightforward as well, as there are also PWM receivers.
More clearly, Shane explains it:

there is the link between the receiver and the transmitter, which is wireless
that is what DSM, DSM2, DSMX, FHSS, and 2.4GHz refer to
then there is the link between the receiver and the microcontroller controlling the quadrotor
that is what PWM, serial, and sbus refer to
so you can mix and match, to some extent…you can have a DSM PWM receiver or a DSM serial receiver
you cannot have a DSM Sbus receiver though
because DSM is a Spektrum technology and S.Bus is a Futaba technology and they are competitors

With respect to the hobbyking microquad kit, Shane says:

the one that came with my microquad is a DSM2 serial receiver
which can bind with any DSM transmitter
but some of the more commercial microquads (less targeted towards RC people, more towards being sold in gift stores) tend to use generic 2.4GHz serial receivers
which are not compatible with DSM
so they sell them with the matching transmitter
and that’s all you can use

me:

and I cannot find a receiver that will pair with that el commercial transmitter easily
so not reusable in that manner either
correct?

Shane:

not likely
unless they happen to use the same generic 2.4GHz chip

==========
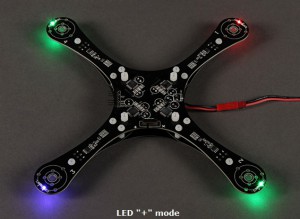
The other thing I can get is to get a hobbyking microquad frame, the one without flight controller, motors, props, and batteries. This may be the path to follow in the future if I want to build my own atmega quadrotor from near-scratch, like my fellow builders (Shane: http://www.instructables.com/id/PCB-Quadrotor-Brushless/ , Charles: http://www.etotheipiplusone.net/?cat=89, Jamison: http://thevariableconstant.blogspot.com/p/kawaiicopter-v13.html).
Micro Integrated PCB w/ESCs Quadcopter Frame 235mm (KIT) (USA warehouse)
(doesn’t come assembled)
So, it’s missing a lot of things, including the flight controller
About flight controllers, Charles says:

KK, Ardupilot, and Multiwii are the three well known top level strains
they all work about the same with different levels of integration and size
and available software
KK is fairly basic and self contained
to ardupilot where you can use PC side software and set waypoints and live data streaming and what not
for a micro quad you’d proabbly be gunning for size and weight the most 

my recommendation would be http://www.hobbyking.com/hobbyking/store/__27033__MultiWii_328P_Flight_Controller_w_FTDI_DSM2_Port.html for your list – it’s extremely small and is basically an arduino so you can code hack easily
and it has all n degrees of freedom you could want anyway
i would wager against the “hobbyking native” boards – they are typically based off old KK versions 

With this frame, though, I can use my own transmitter, which means I can use el cheapo 2.4 ghz transmitters from hobbyking. I could also start development on my own flight controller board, initially with the expensive ($40-$60) IMU boards from sparkfun and then eventually down to just using the invensense MPU3050 or MPU6050 ICs ($3 or something).
===========

So at the end of today that’s where I’m at. I’m still forming the shopping list, but I thought I should get this braindump out. I am going to investigate all options — 
  1. the hobbyking atmega kit (just needs a cheap DSM transmitter, but then I could not release the full kit as open source, and the transmitter costs $20 on ebay so the total cost is ~$70 and I don’t know how to legit source DSM transmitters in large quantities for cheap yet — otherwise the total cost is closer to $120)
  2. the hobbyking frame (for research into building my own quad), loading my own firmware onto a commercial quad that is atmega-based (have to find one that is first, or investigate the ARM source code available currently)
  3. and building a pcb quadrotor from scratch.
Additional trade-off: smaller copters are safer and less likely to maul you, but their time constants are also smaller so that they are harder to program controls for.
===========
Appendix
Things Shane said: 

yeah the receivers on the HK microquad are serial output, not PWM
they would feed into a bigger, PWM-output receiver on a model airplane
so you could have two or more serial “satellite” receivers feeding on master PWM receiver
for redundancy on large model airplanes
if one satellite fails, the other still works

additionally
the microquads tend not to use PWM receivers, though, because they’re too big
you can get really small ones or take the case off and desolder all the headers from the big ones
yeah just look for four channel micro receivers
but there are only a few that will actually bind to the HobbyKing radios
and i’m not sure if they have small ones
DSM is a more widely used protocol so you can find DSM receivers of all shapes and sizes

Conversation between Charles and I:

do those flight controllers also have software on them / in the community? 

yes, you do not have to write the software, it comes preloaded 

but is the source code available to work with 

yes it is as far as i know they’re all community/OS projects 

are any of the microquads on the market atmega based? the complete ones on the market like the hubsan x4 

oh that i don’t know unless they specifically advertise one of the big hardware families, i doubt it
the KKs are ATmega1280? based
modern ardupilots are all atmel ARM cores

* Shane said:

one is that the most expensive part is the plastic and mechanicals

two is that their customer base (RC people) is different than the customer base for the little transmitters that come with the micro quads

the RC people want full-range transmitters (100mW Tx power or more)

so they can fly full-size planes outdoors with them

the ones that come with the micro quads are low-power transmitters for indoor use

maybe 10mW

you can get one of those for pretty cheap: http://compare.ebay.com/like/380587527000?var=lv&ltyp=AllFixedPriceItemTypes&var=sbar