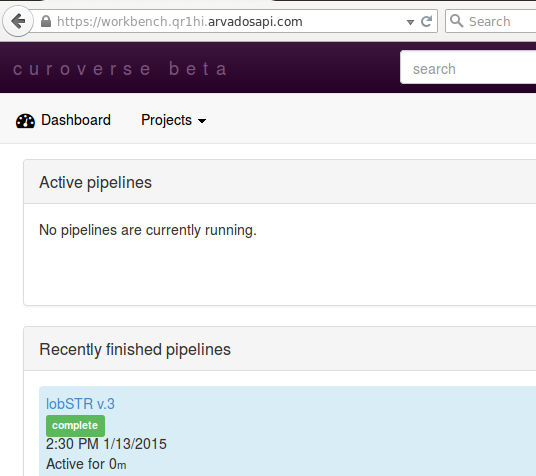
I wanted to consistently remove the top navbar (here in purple) on a website for some GUI documentation I’m working on (yep, for Arvados). Basically, the purple navbar doesn’t add any useful info and takes up limited real-estate in my screenshots.
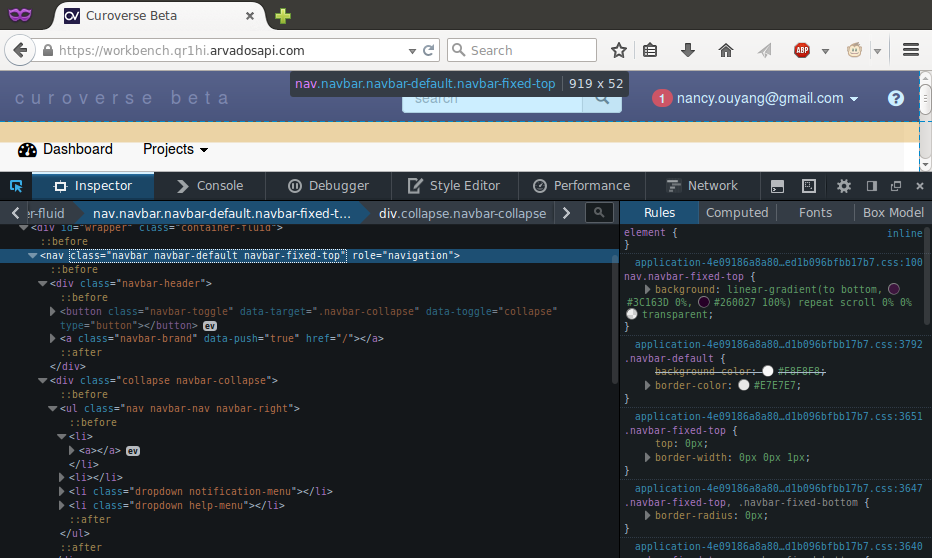
My initial method was to delete it using chrome / firefox’s powerful built-in inspector tools. ctrl-shift-c brings them up.
After selecting the correct div, I can just hit del and it will delete that section of code, thus removing the navbar. (control-z to undo if you delete the wrong section). However, this doesn’t persist across refreshes/clicks to other pages.
Now, we just write two lines of javascript to remove the navbar (you can also test this javascript out in the ctrl-shift-c Firefox Developer Tools by going to “Console” and then “JS” and entering in lines of code there). I used this script as a template. Simply specify where the script should apply & then which div to remove.
// ==UserScript==
// @name Arvados: Remove Top Navbar
// @namespace nouyang
// @description Removes the div in front of the image
// @include https://workbench.qr1hi.arvadosapi.com/*
// @version 0.0.1
// ==/UserScript==

document.getElementsByClassName('navbar-fixed-top')[0].remove()
Save as “removenav.user.js”
UPDATE 31 July 2015: To explain a bit further, the extension “.user.js” is special to Greasemonkey. Also, the “@include”line indicates what domain / URLs / pages this particular script should be active on.
According to their manual, I just need to visit any “.user.js” file in my browser and Greasemonkey will offer to install it. Sure enough, drag-and-drop the file into Firefox or enter it into your Firefox location bar
file:///home/nrw/Desktop/work/removenav.user.js
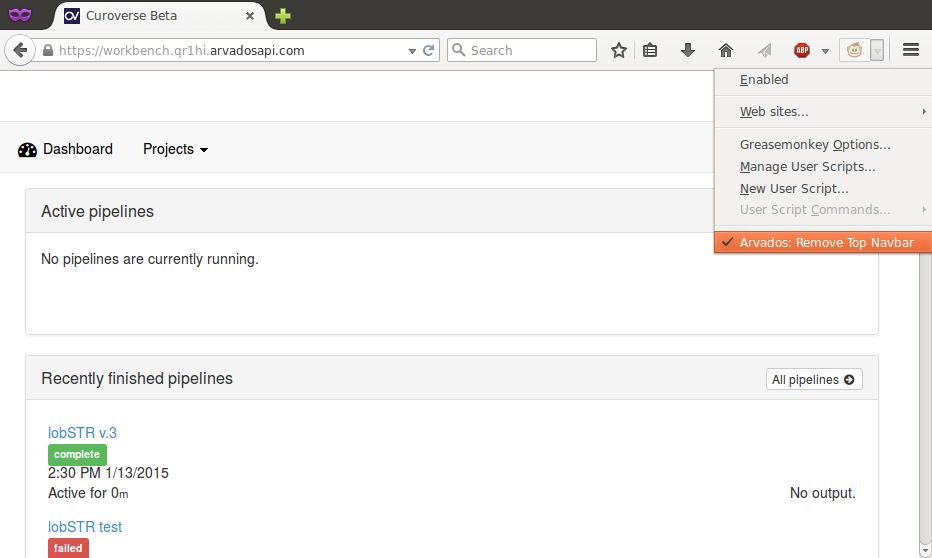
and greasemonkey offers to install it. Bam! Done. Make sure greasemonkey is enabled and that you haven’t made typos (for instance, http vs https) and then if you visit your website, the div should be gone.
Okay, for whatever reason you want to take a bunch of screenshots all of the exact same dimensions.
In my case, it was because I wanted to have an image carousel of some “key features” of this open source software project I’m contributing to called Arvados.
mmm, such bouncing on the image carousel. :/
Well, it’d be nice to visually select what area to screenshot, while keeping the dimensions constant. The default Gnome / Ubuntu screenshot tool, while versatile, does not enable this.
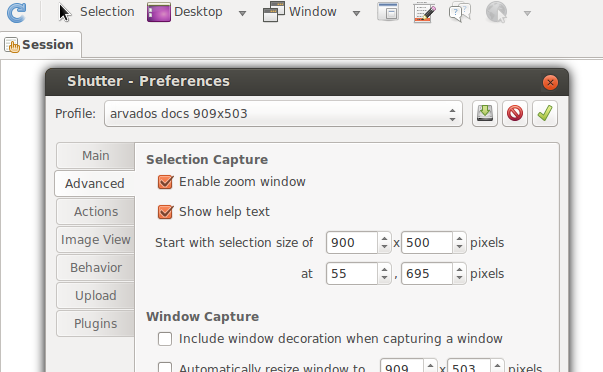
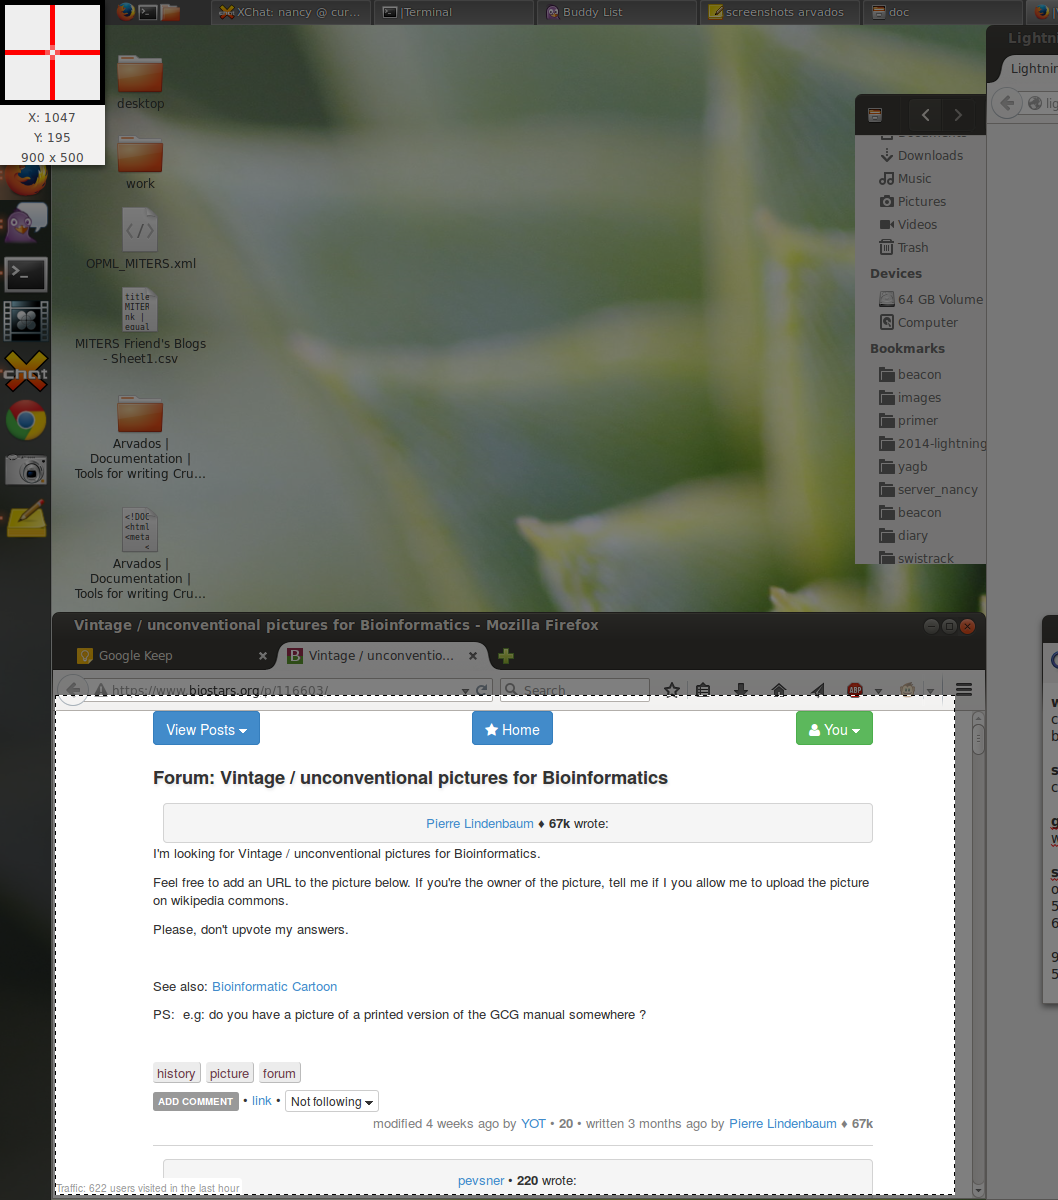
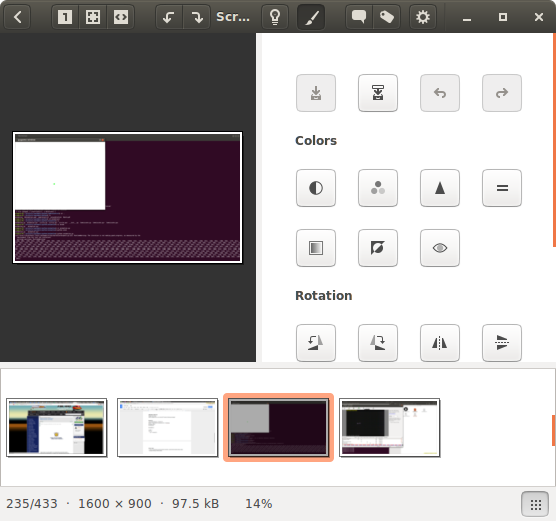
I wish this byzanz thing had a visual interface to select the area you want to screencast, but failing that, you can use shutter to pick out the start x, y coordinates as well as the width and height by using shutter’s visual interface:
Image 1. BTW, speaking of screenshots of screenshots, I took this [screenshot of (shutter taking a screenshot)] using “gnome-screenshot –interactive” (of the whole screen, and cropped it with gThumb) + a delay of 5 seconds
back to screenshots: taking them properly the first time
Alright, let’s fix this bouncing-image-size problem.
$ sudo apt-get install shutter
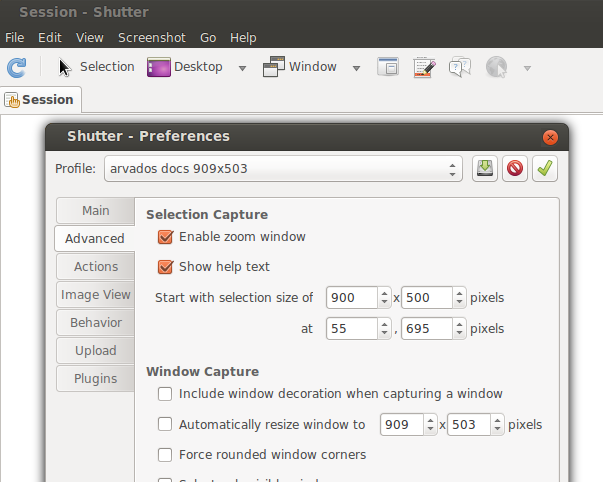
Then, simply go to Edit > Preferences > Advanced and enter the size of the screenshots you want to take. As to how to find the appropriate x, y pixels, I trial-error’d it / used shutter’s interface itself (as shown above, where it shows you the x,y coordinates of your mouse) in order to find the correct starting point. I believe it marks the top left edge of the selection box, with the origin starting at the top left of the monitor, but who knows.
Image 2
Voila, as shown in Image 1 above, when you hit “selection” it auto-starts the rectangle selection box at the correct place and with the correct dimensions. You can click-drag the box around to fine-tune the placement. Sadly, you can’t “click under” the selection box to interact with the window below, so if you need to adjust anything, “esc” key out of the selection interface.
Done!
but what about re-cropping a ton of images
There’s easy was to automatically resize images down to a certain size, but I wanted to do more of a manual re-cropping process, since most of the images were “pretty-close” to the correct size. I found a decently streamlined way to do this.
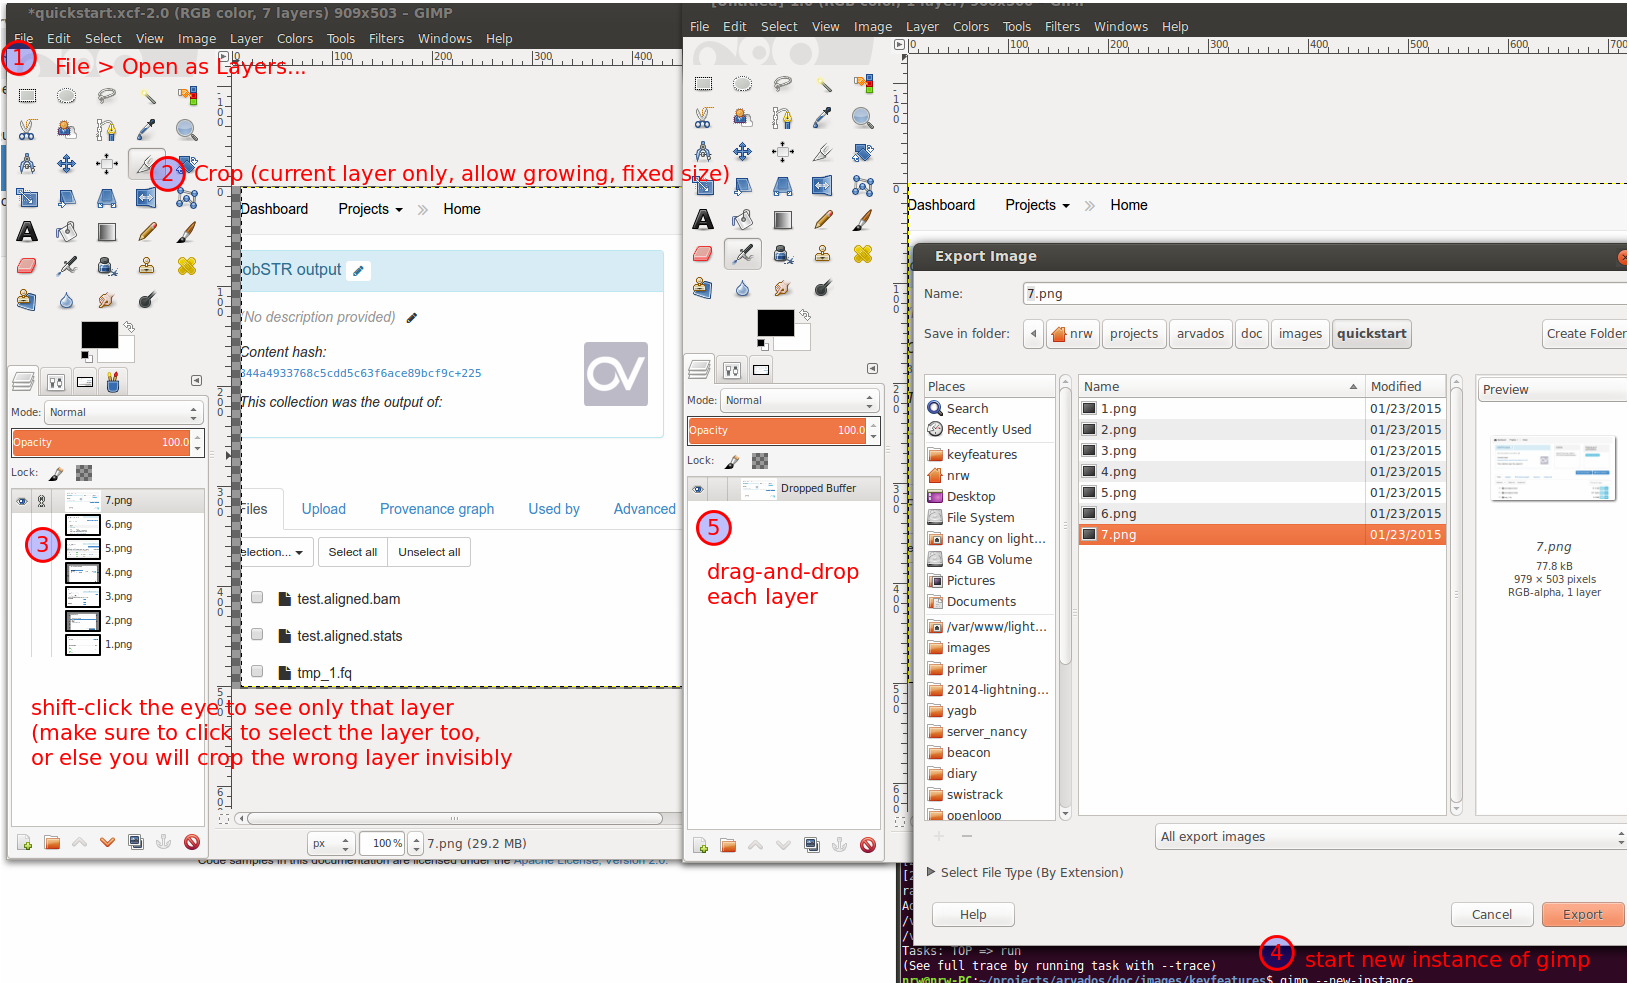
I settled on using GIMP. First, start GIMP. ( optional: make a first layer bigger than all pictures). Then, File > Open as Layers… and select all the images you want to crop.
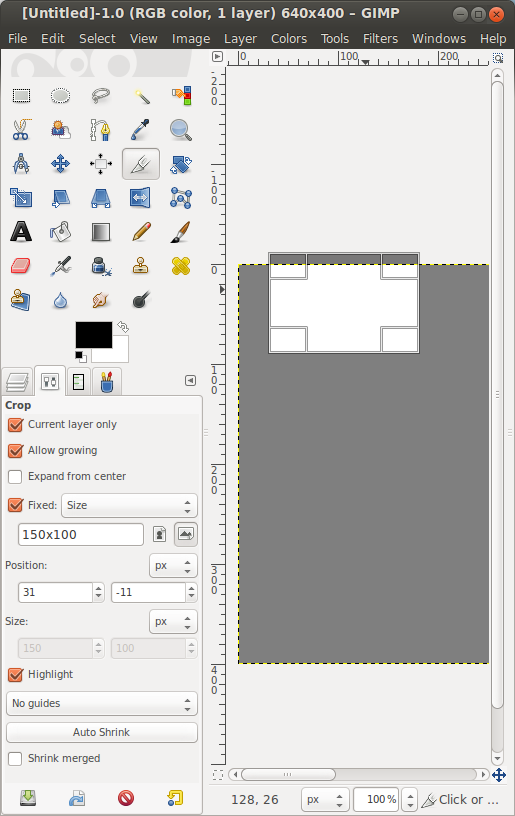
Then, edit the crop tool options. Fixed “Size”, Current layer only, Allow growing. Click-drag-release, you’ll get a selection box you can move around or even off the page.
Crop as desired. Pro-tip: You can shift-click the “eye” column to view a single layer. Make sure to also click on that layer, or else you’ll crop the active layer which is not visible.
$ gimp --new-instance
then drag-and-drop each layer into the main window of the new GIMP instance, which will auto-create a new image. Right-click > Remove alpha channel if you want to fill transparent spaces with white. Then,
Ctrl-E (export), select the file you wish to replace, enter-enter-enter (accept default PNG options), ctrl-w (close image), ctrl-d (confirm closing image).
Drag the next image over, rinse and repeat.
tangent
there was a sweet “export layers as individual images” python plugin, and it seemed like all you need to do was download the zip, copy the folder and .py script inside to ~/gimp-2.9/plugins, and restart GIMP. Unfortunately I could not get it to work.
Failed to execute child process "/home/nrw/.gimp-2.8/plug-ins/export_layers" (Permission denied)
Oh well. As described above, I found a workaround. Slightly more tedious, but fine for the two dozen images I had.
tangent: sweet bash one-liner: list image sizes in directory
say you want to quickly check how many different file sizes you have in a directory
You need imagemagick and sed installed. Thanks to stackoverflow for the identify line.
This outputs a width, height tab-delimited list of filesizes in the current directory (I’m trying to see how many different sizes of images I have in my directory)
gThumb quickly shows you in a GUI the sizes of your images
(no, I don’t know why all my GUI buttons are on the top of my windows :/ it’s really disorienting to hit “cancel” on your titlebar…)
btw, failed methods
Alt-printscreen (screenshot of active window) to take a screenshot of a firefox window tiled using cinnamon’s window tiling features, so theoretically always of the same size (1/4 of the screen) as long as I’m using the same monitor. But I didn’t want to keep cropping the firefox tabs and stuff out of the picture.
FireShot: I used these for the original screenshots. But the screenshots vary in size depending on whether there are horizontal scrollbars / vertical scrollbars present, which led me to my bouncing-carousel predicament when I thought all the pictures were the same size. A pretty sweet tool, though.
Recently I wanted to speed up some of my youtube videos. Youtube has a built-in editor, so why do you have to speed-up youtube videos with openshot?
youtube editor & limitations
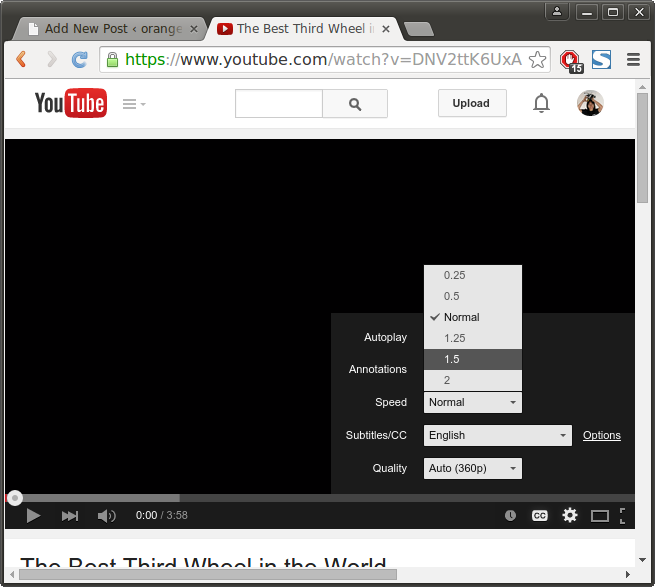
Youtube video player lets you playback any video at faster or slower speeds
But what if I want the default to be a faster speed? Turns out you can use youtube’s sweet in-browser video editor to do just about everything…
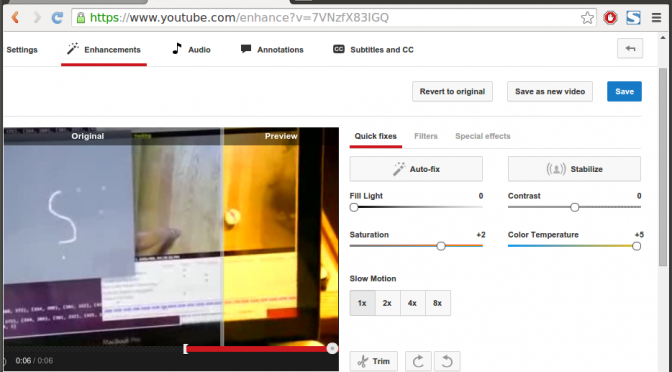
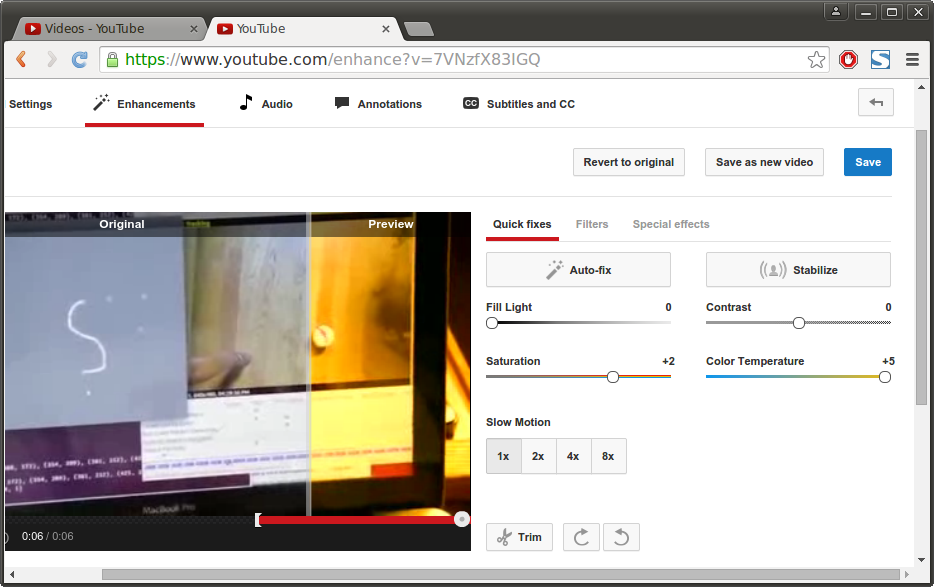
Just got to youtube.com/my_videos and click “Edit” on any of your videos and you’ll see this:
(Simple Mode) here with color and saturation changes
(Advanced Mode) here with some weird filter & showing compositing existing youtube videos/music, and some text overlay
BUT! In youtube’s editor, you can slow down your video, but you can’t speed up your video :/ (what? you can do it on-the-fly in playback but not in the video editor? why is this?)
step-by-step in 2 minutes
My simple solution, on Ubuntu 14.04, is to use the open-source tool OpenShot (no windows / mac installers yet, it appears).
1. Install
$ sudo apt-get install openshot
2. Download your youtube video
$ sudo apt-get install youtube-dl
$ youtube-dl [your video url, for instance:]
$ youtube-dl https://www.youtube.com/watch?v=DNV2ttK6UxA
Pro-Tip: If your recording was hand-held, use youtube’s video editor to “Stabilize” your video first, or else it will be very uncomfortable to watch it sped up. Then download it after the changes have been applied. You can see the “stabilize” button in the image for “Simple Mode” above.
3. Start OpenShot.
Drag-and-drop your video into editor (near “Thumb” at the top).
Then drag it to the timeline (here “track 2” near the bottom).
Right-click > “Properties” > Choose a speed (here “5x”).
Click “Apply”.
Click “Advanced” if you want a speed that isn’t listed.
4. Hit the green “play” button to see if the speed looks okay.
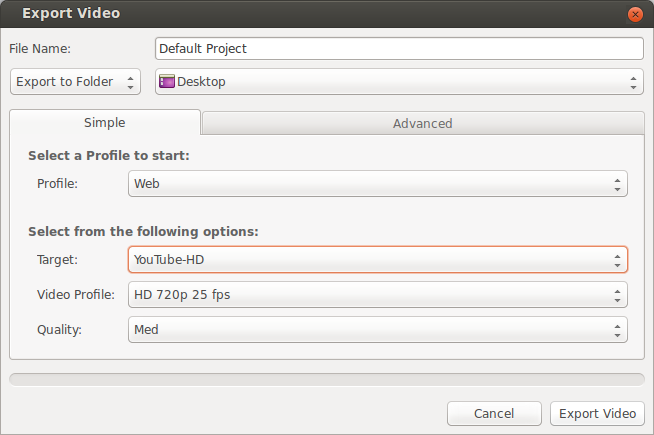
5. File > Export Video > Choose the “youtube” profile.
6. Upload to youtube.
7. Profit!
Pro-tip: If you only want to speed up part of your video, first set everything to normal speed, break the clip up into chunks with the scissors tools, and then change the clip properties of individual clips to speed up whichever ones you want.
OpenShot seems to do weird things if you first speed up the video, cut it up, and try to return sections to “normal” speed.
Actually, even the former method seems to clip off ends of the video, so double-check it’s all there before you export.
example
Here’s the microwave at work, which has a mind of it’s own: