Gitlab + Mattermost on Ubuntu 16.04

In this post, we

  1. Install gitlab omnibus and enable mattermost
  2. Get mattermost to accept gitlab credentials
  3. Use ports and a second domain name we have full control over to get around not being able to install mattermost in a subdirectory
  4. Solve an annoying “Failed to upgrade websocket connection” error in Mattermost that means it doesn’t have real-time services
  5. Learn how to purge mattermost data

Specifically, we have two domain names.
a) organizational-domain.com (in our case, a .edu domain), which all our files will be created on
and
b) your-domain.com (in our case, a domain we registered separately through godaddy)

To resolve that we a) cannot create subdomains on the organizational domain, and b) must install mattermost on a subdomain, not a subdirectory, we will create subdomains on your-domain.com and point them to ports on the organizational domain

git.your-domain.com –> http://organizational-domain.com:8001
mattermost.your-domain.com –> http://organizational-domain.com:8007

Install Gitlab Omnibus, Community Edition, for the first time
(Note: Omnibus i think just refers to the official latest and greatest gitlab release)
0a. Add gitlab repository as per https://about.gitlab.com/downloads/#ubuntu1604
0b. sudo apt-get install gitlab-ce

If not first time: Uninstall and Purge Gitlab Data
https://gitlab.com/gitlab-org/omnibus-gitlab/blob/6-9-stable/README.md#uninstalling-omnibus-gitlab
1. sudo gitlab-ctl uninstall
Stop gitlab processes
2. sudo gitlab-ctl cleanse
Remove all omnibus-gitlab data
3. sudo apt-get remove gitlab-ce

Reinstall Gitlab
4. sudo apt-get install gitlab-ce
5. sudo gitlab-ctl reconfigure

Re-configure Gitlab
6. sudo vi /etc/gitlab/gitlab.rb
6a. external_url “http://organizational-domain.com:8001″
6b. mattermost_external_url ‘http://organizational-domain.com:8007′

(Note: these ports, 8001 and 8007, were arbitrarily chosen and just needs to match Apache’s configuration in /etc/apache2/sites-enabled/gitlab.conf & /mattermost.conf)

7. sudo gitlab-ctl reconfigure

8. Go to http://git.your-domain.com
8a. It will ask you to set a password
8b. Sign in to gitlab, the username is root and you just set the password

Reconfigure Mattermost
9. Get mattermost to accept gitlab’s single-sign-on
9a. On git.your-domain.com, go to Profile Settings > Applications

Add new applications
Name: Mattermost
Redirect URI: 
http://mattermost.your-domain.com/signup/gitlab/complete
http://mattermost.your-domain.com/login/gitlab/complete
Save Application

You will get an Application ID and Secret, which you will use in the next step.

9b. Edit /etc/gitlab/gitlab.rb, uncomment and fill out
mattermost[‘gitlab_enable’] = true
mattermost[‘gitlab_id’] = “12345656”
mattermost[‘gitlab_secret’] = “123456789”
mattermost[‘gitlab_scope’] = “”
mattermost[‘gitlab_auth_endpoint’] = “http://git.your-domain.com/oauth/authorize”
mattermost[‘gitlab_token_endpoint’] = “http://git.your-domain.com/oauth/token”
mattermost[‘gitlab_user_api_endpoint’] = “http://git.your-domain.com/api/v3/user”

(Note to self: make sure to put “git.your-domain” and not “gitlab.your-domain” to keep everything consistent)

10. sudo gitlab-ctl reconfigure

Test it!
11. On gitlab, register a non-admin account
Foobar
foobar@mailinator.com
asdf1234

12. On gitlab, sign out as root and signin as foobar

13. Go to mattermost.your-domain.com
13a. Create an account with Gitlab Single Sign-On
13b. Authorize

14. Create a new team
15. Team Settings > Allow any user with an account on this server to join this team: Yes

16. Make sure real-time communications work: open a new tab and make sure you don’t need to refresh to see the chats update

Fin.
===============

Alternative way to purge Mattermost data:

Getting the Mattermost CLI to work in Gitlab Omnibus
The Mattermost CLI is documented here https://docs.mattermost.com/administration/command-line-tools.html
However as we are using Mattermost as part of Gitlab, it is a bit finicky [1] and we must use this shell script:

$ sudo vi mattermost.sh

#!/bin/sh
cd /opt/gitlab/embedded/service/mattermost
sudo -u mattermost /opt/gitlab/embedded/bin/mattermost -config=/var/opt/gitlab/mattermost/config.json $@

$ sudo sh mattermost.sh -help
(Just to check that the script is working)

Now, to delete a team:
$ sudo sh mattermost.sh -permanent_delete_team -team_name=”first slack team”
Have you performed a database backup? (YES/NO):
YES
(Otherwise it will abort)

Fin.

[1] Credit to: http://forum.mattermost.org/t/where-to-find-mattermost-after-installing-gitlab-omnibus/175/7

===============
Troubleshooting: Misc
sudo cd` fails; switch to interactive mode using `sudo -i` and then run your commands. (eg `cd`)
sudo service apache2 restart
a2dismod & a2enmod

Troubleshooting: Log Locations
sudo gitlab-ctl tail
sudo tail -f /var/log/gitlab/mattermost/mattermost.log
sudo tail -f /var/log/apache2/error.log
sudo tail -f /var/log/gitlab/nginx/gitlab_mattermost_access.log
sudo tail -f /var/log/gitlab/nginx/error.log

Troubleshooting: Firewalls?
$ sudo netstat -plnt | grep :8001
(you should see
tcp 0 0 0.0.0.0:8001 0.0.0.0:* LISTEN 12668/nginx
Else, if the port isn’t in use, you’ll see nothing)

or

$ nc -l 8001
( you should see
nc: Address already in use
Else, you’ll see nothing)

If the port is open and not firewalled, you should be able to talk to yourself
In tab one: $ nc -l 8002
In tab two: $ nc organizational-domain.com 8002
Whatever you type in one tab should show up in the other

Notes: Apache Configuration to avoid Mattermost websocket errors

For proper websocket updating, you must enable
$ sudo a2enmod proxy_wstunnel
(Just in case, though gitlab install should have enabled this:
sudo a2enmod proxy_http)
$ sudo service apache2 restart

/etc/apache2/sites-enabled$ sudo vi mattermost.conf

<VirtualHost *:80>
ServerName mattermost.your-domain.com
ServerSignature Off
ProxyPreserveHost On

<Location />
Require all granted
ProxyPassReverse http://127.0.0.1:8007
ProxyPassReverse http://mattermost.your-domain.com/
</Location>
RewriteEngine on
RewriteCond %{REQUEST_URI} ^/api/v3/users/websocket [NC]
RewriteRule /(.*) ws://127.0.0.1:8007/$1 [P,L]
RewriteCond %{DOCUMENT_ROOT}/%{REQUEST_FILENAME} !-f
RewriteRule .* http://127.0.0.1:8007%{REQUEST_URI} [P,QSA]

</VirtualHost>

The bolded lines essentially catch requests by Mattermost to the websockets API and makes sure they are redirected to ws://

(Otherwise you will not get real time updates and will get lots of ” Failed to upgrade websocket connection” in the Mattermost log, var/log/gitlab/mattermost/mattermost.log)

Credit to http://serverfault.com/questions/616370/configuring-apache-2-4-mod-proxy-wstunnel-for-socket-io-1-0/etc/apache2/sites-enabled/gitlab.conf is identical, minus the two bolded websocket lines; and with URL and port changed.

<VirtualHost *:80>
ServerName git.your-domain.com
ServerSignature Off
ProxyPreserveHost On
<Location />
Require all granted
ProxyPassReverse http://127.0.0.1:8001
ProxyPassReverse http://git.your-domain.com/
</Location>
RewriteEngine on
RewriteCond %{DOCUMENT_ROOT}/%{REQUEST_FILENAME} !-f
RewriteRule .* http://127.0.0.1:8001%{REQUEST_URI} [P,QSA]
# needed for downloading attachments
DocumentRoot /opt/gitlab/embedded/service/gitlab-rails/public
</VirtualHost>

Credit to https://kevingoedecke.me/2015/09/17/setup-gitlab-on-debian-7-with-existing-apache-webserver/ &

Fin.

Installing Grav (a flatfile alternative to WordPress?) on Ubuntu 16.04

Jump down to “1. Install” if you just want the five-minute walkthrough I worked out for Ubuntu 16.04.

Grav Backend
Grav Backend

0. Background

I recently ran across Grav, “A modern open source flat-file CMS”. It looks like a promising alternative to WordPress that should be easier to customize to do what I want.

The lack of a need for a database should make installing on servers less painful as well. I also like the idea of writing in my posts in Markdown by default — I often struggle on my current wordpress-based blog with formatting issues. However, I still want drag-and-drop image support, since many of my blog posts are image heavy.

Additionally, last year (for grad school applications) I made an attempt at a separate portfolio site, using Jekyll with the Freelancer theme by Start Bootstrap. However, it left to be desired in terms of ease of updating and more.

Screenshot from 2016-11-24 17:58:47
My portfolio site, nancyouyang.com || https://github.com/nouyang/nouyang.github.io

I took a chance and tried out Grav, and really liked what I saw.

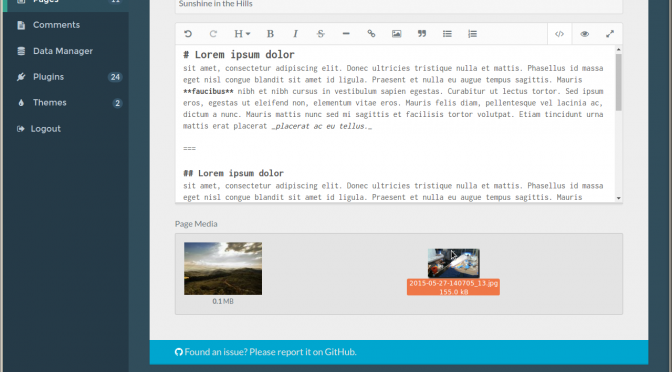
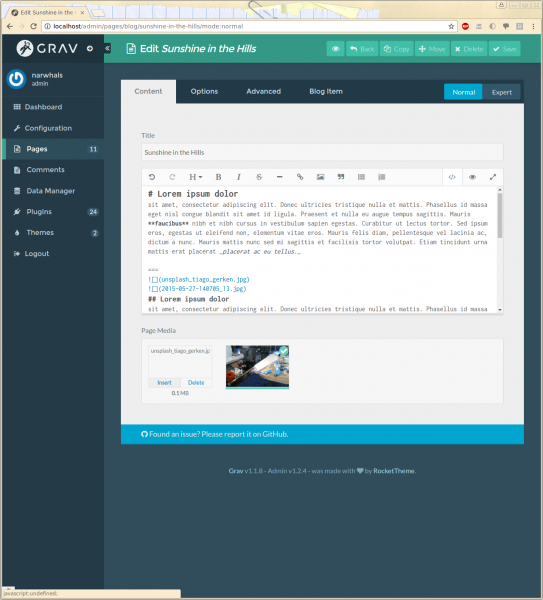
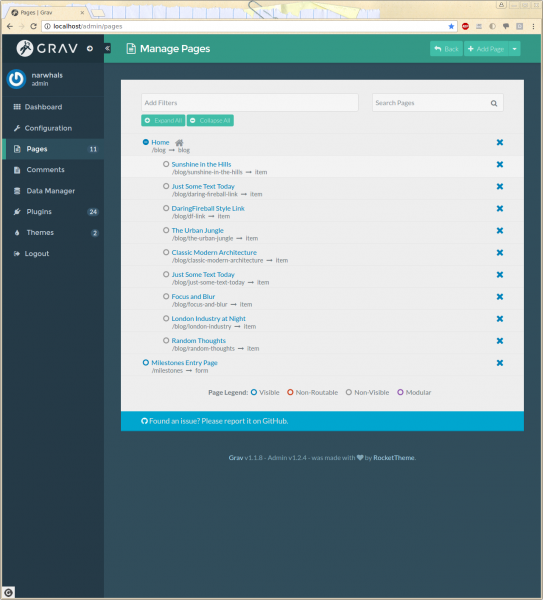
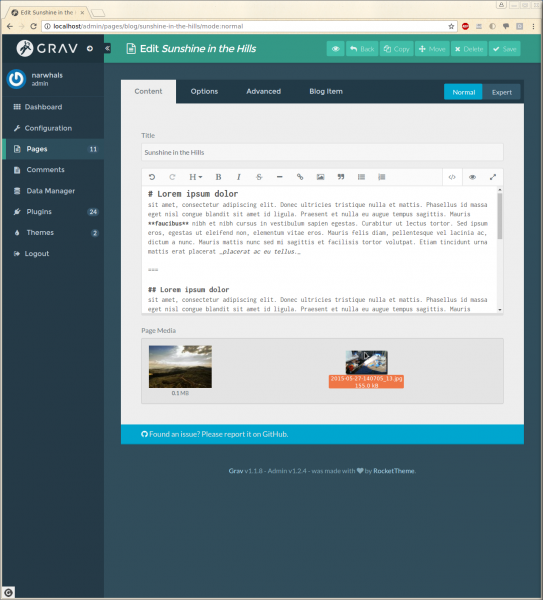
Grav Admin Interface
Grav Drag and Drog Image GUI


Screenshot from 2016-11-24 17:20:30
Grav Markdown Page Editor
Grav TwentyFifteen Skeleton (a port of WordPress TwentyFifteen theme)

I can already see some cons, though. For one, it’s not easy to tell which themes are compatible with your existing site structure.

Oh well, maybe in a few years something better will come along. I decided I was intrigued enough to sink a few days into learning how to operate and customize Grav.

1. Install

The main errors I worked through were a missing PHP module and a permissions error.

(Some of these errors only showed up when I saved a page or tried to upload an image. See section 3 for the exact errors I was getting).

Note: I chose to install under /var/www/html/grav so everything shows up at http://localhost/grav, but you can definitely do everything directly under /var/www/html

From the grav homepage, https://getgrav.org/, go to Downloads, and then to Skeletons.

We will be using a Grav Skeleton, specifically the one called “TwentyFifteen Site”.

A Grav Skeleton is effectively an all-in-one sample site. They include the Grav Core, required plugins, as well as appropriate pages for content and a theme for pulling it all together. [src]

SSH / Login to your server.

Note: Apache2 should already be installed by default. If you go to /var/www/html you should find an index file (“Apache2 Ubuntu Default Page”) that should also show up when you go to either localhost or your domain name (e.g. http://your-site.com) in your browser.

sudo apt-get install unzip
cd /var/www/html 
wget 
https://github.com/getgrav/grav-skeleton-twentyfifteen-site/releases/download/1.0.3/grav-skeleton-twentyfifteen-site-v1.0.3.zip
sudo unzip grav-skeleton-twentyfifteen-site-v1.0.3.zip
mv grav-skeleton-twentyfifteen-site-v1.0.3.zip grav
cd grav
sudo vi perm.sh
#!/bin/sh
chown www-data:www-data .
chown -R www-data:www-data *
find . -type f | xargs chmod 775
find ./bin -type f | xargs chmod 775
find . -type d | xargs chmod 775
find . -type d | xargs chmod +s
umask 0002
sudo sh ./perm.sh
sudo add-apt-repository universe
sudo apt-get install php7.0-fpm php7.0-cli php7.0-gd php7.0-curl php7.0-mbstring php7.0-zip php-apcu php7.0-xml
sudo service apache2 restart

Go to http://your-site.com/grav/admin (or localhost/grav/admin)

  • You should be prompted to create a user
  • Login to admin
  • http://your-site.com/grav/admin/pages
  • Create and save a page with an image in it

If this works, everything should be great!

2. Troubleshooting

Here I document miscellaneous things I did and tricks I learned.

Permissions

The permissions fix came from Grav documentation, under “11. Troubleshooting” > “Permissions”:

PHP

Grav needs PHP 5.5.9 or higher. https://learn.getgrav.org/basics/requirements

$ php -v

PHP 7.0.8-0ubuntu0.16.04.3

To check which modules are enabled, we can set up use phpinfo()

/var/www/html$ sudo vi test.php
<?php phpinfo(); ?>

Then go to http://localhost/test.php and e.g. search for “mbstring”

Make sure to remove this file after you’re done.

Enable Universe repository

The other issue I ran into was not realizing I couldn’t sudo apt-get install the missing PHP modules because I hadn’t enabled the universe repository.

nrw@the-PC:~$ cat /etc/apt/sources.list

Apache

To enable an Apache module:

$ sudo a2enmod rewrite

(to disable: sudo a2dismod)

$ sudo service apache2 restart

Grav Troubleshooting Features

You can enable the Debug Bar

$ sudo vi /var/www/html/grav/user/config/system.yaml
debugger:
    enabled: true

Also the Error Display

$ sudo vi /var/www/html/grav/user/config/system.yaml
errors:
    display: true

Grav Logs

The logs are at /logs/grav.log

$ tail -f /var/www/html/logs/grav.log

3. Appendix: Errors

The specific errors I encountered

‘mbstring’ extension is not loaded. This is required for Grav to run correctly

Permission denied in /var/www/html/grav/vendor/rockettheme/toolbox/File/src/File.php

0 – An exception has been thrown during the rendering of a template (“The cache/gpm folder is not writable. Please check the folder permissions.”) in “partials/plugins-list.html.twig” at line 19.
if (is_file($path . ‘/’ . $this->_original->name())) {
rename($path . ‘/’ . $this->_original->name(), $path . ‘/’ . $this->name());

“rename(/var/www/html/grav/user/pages/01.blog/new-page/item.md,/var/www/html/grav/user/pages/01.blog/new-page/item.en.md): Permission denied”

Wifi: Connect to eduroam & permanently store password (ubuntu 14.04 with cinnamon, with MIT account)

NOTE 27 Dec 2019: below may be out-of-date; for up-to-date and for Android instructions, see new post: http://www.orangenarwhals.com/2018/01/connecting-to-harvard-wireless-without-having-to-install-sketchy-things/

OUTDATED (kept as techniques may be useful for troubleshooting)

With your MIT account and your athena password you can connect to the “eduroam” wireless network present in many universities.

Follow KB instructions to add the eduroam via GUI

http://kb.mit.edu/confluence/pages/viewpage.action?pageId=152599592

Unfortunately for me, I could not “edit” the eduroam connection. Instead I “added” eduroam as a new connection.

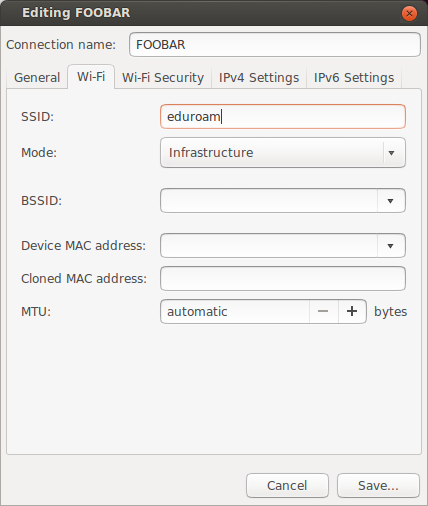
Network Connections > Add > Wifi > Create >

Connection Name: FOOBAR

SSID: eduroam

Screenshot from 2016-11-13 15:46:05


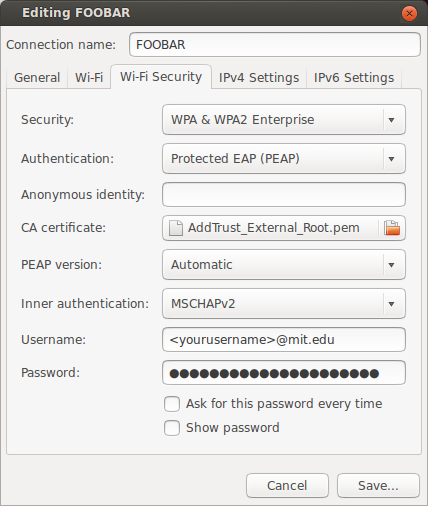
security: WPA & WPA2 Enterprise

authentication: PEAP

CA Certificate: /etc/ssl/certs/AddTrust_External_Root.pem (this file already existed on my filesystem, I did not need to download it)

Screenshot from 2016-11-13 15:45:59

Storing the password

When I did the above steps, I could connect to eduroam, but I would have to type in my password each time. This gets annoying especially on unstable connections.

I’m not sure the exact trick, but essentially, use

$ nmcli con status

to find the UUID. Something like “dd4ad68a-dc57-420d-856c-3aca862652a3”

Then create a file,

/etc/NetworkManager/system-connections$ sudo vi FOOBAR-dd4ad68a-dc57-420d-856c-3aca862652a3

Inside the file put the contents as follows.

(Note that this is the same contents as in the “FOOBAR” file in the same folder, that the GUI created for us when we added the eduroam connection in the network-manager in the first step. Except! We we add the line:

password=<yourpassword>

and we change the flag from 1 to 0:

password-flags=0)

[connection]
id=FOOBAR
uuid=dd4ad68a-dc57-420d-856c-3aca862652a3
type=802-11-wireless

[802-11-wireless]
ssid=eduroam
mode=infrastructure
security=802-11-wireless-security

[802-11-wireless-security]
key-mgmt=wpa-eap

[ipv4]
method=auto

[ipv6]
method=auto

[802-1x]
eap=peap;
identity=<your_username>@mit.edu
ca-cert=/etc/ssl/certs/AddTrust_External_Root.pem
phase2-auth=mschapv2
password-flags=0
password=<yourpassword>

Now you should  be able to connect to eduroam by selecting it in the network manager GUI, and it should connect without

To test, try switching to another network and switching back.

Useful commands:

$ sudo restart network-manager
$ nmcli con up id eduroam
$ nmcli con status