
friend gave me a waveshare LCD, it’s got IMU + rp2040 microcontroller + lipo 1S charger + 1.28” LCD screen (full color!), and usb-C connector to boot, for $17. Jeez. What has this world come to XD; anyhow, so finally got around to playing around with it 😀
This is their demo (you plug in to power and get this)
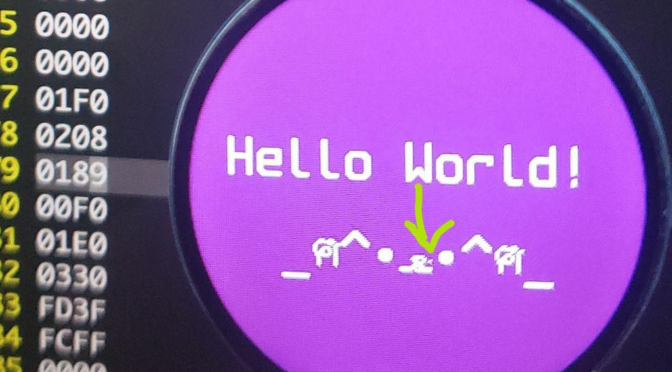
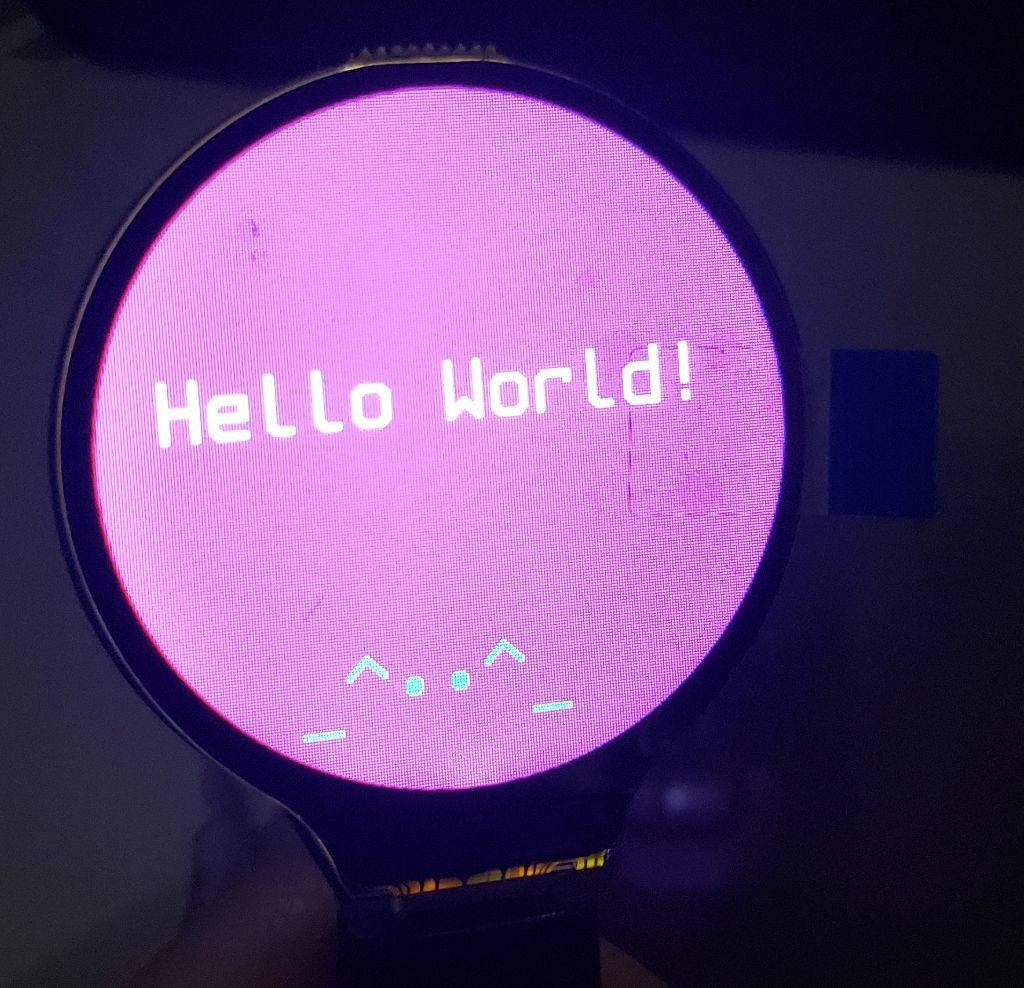
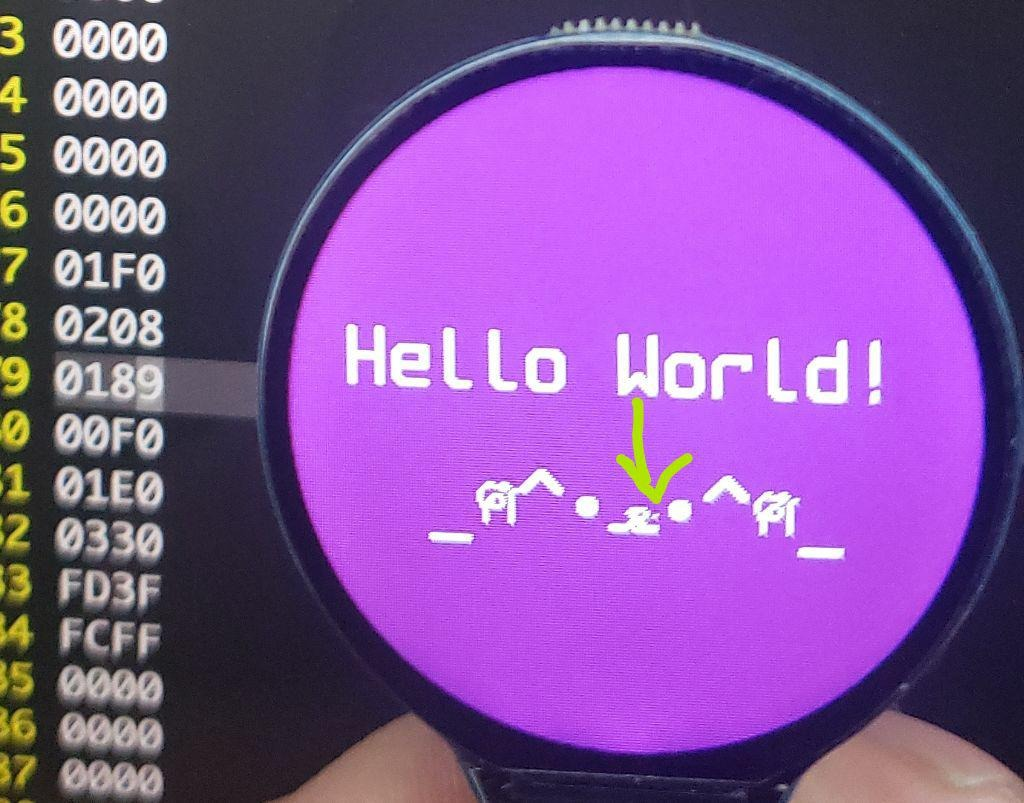
And this is my “Hello World” 😀
And the code is really straightforward:
   def main_menu(self, sleep_time=0.05):
        self.fill(self.color('purple'))
        self.draw_text("banner_text", 20, 100, "Hello World!",
                       self.color('white'),
                       self.font)

        self.draw_text("banner_text", 50, 150, "_ฅ^•ﻌ•^ฅ_",
                        self.color('white'),
                        self.font)
        # self.draw_text("banner_text", 60, 200, "ฅ",

        while True:
            self.update()
Here are the steps I took.
get board to show up as usb drive
(This is starting just from the board out of the box!)
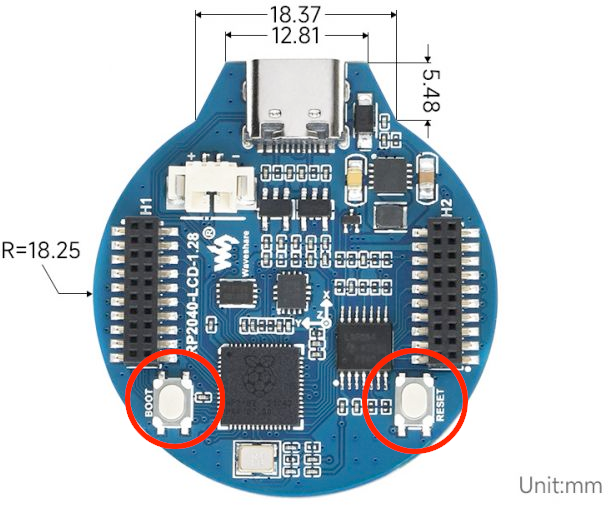
First, I had a frustrating 30 mins where I couldn’t get the board to show up no matter what buttons I held down. Turns out it was just a flaky USB-C cable. ^^; The board has two buttons, boot and reset.
So lessons: To boot into USB drive: what is universal for rp2040 boards (as opposed to specific to e.g. adafruit boards) is to hold BOOT, power on (plug in), then press and release SELECT. The board should up as USB drive then. (rpi something, I forget). (After pressing SELECT, you can release BOOT, or wait for the board to show up before releasing BOOT, shouldn’t matter).
Install Circuitpython
To load circuitpython (should be one-time, unless you f*k up your program or something, which I’ve done)
Copy UF2 (compiled python) file to the board.
https://circuitpython.org/board/waveshare_rp2040_lcd_1_28/
It will have a name such as:adafruit-circuitpython-waveshare_rp2040_lcd_1_28-en_US-8.1.0.uf2
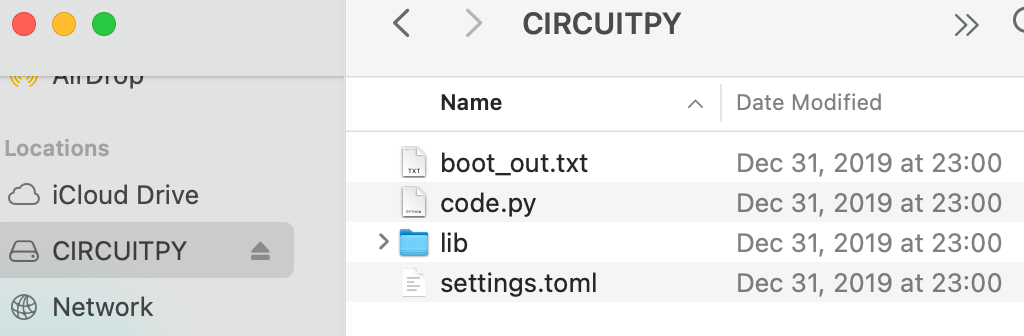
Board will then disappear and then reappear with name “CircuitPython” and the file “code.py”. Now you’re in business!
Then, the waveshare demo file uses micropython instead of circuitpython.
(Circuitpython is a fork of micropython with some sensible defaults).
So I used this code from a reddit user which is written in circuitpython.
https://www.reddit.com/r/circuitpython/comments/11fmwcq/waveshare_rp2040lcd128_example_code/
Copy the file into code.py
However when I ran, got error due to missing libraries. (See Debugging section for more info).
Install libraries
Circuitpython has a bunch of common libraries. Looking at the import statements of the internet demo file,
https://circuitpython.org/libraries
I needed the folders
adafruit_gfx
adafruit_bitmap_font
adafruit_display_text
Therefore, unzip. Make a ‘lib’ folder in your rp2040. Put folders in.
e.g. On a Mac, this structure would look like
├── code.py
└── lib
├── adafruit_bitmap_font
├── adafruit_display_text
└── adafruit_gfx
Additionally, I needed a “gc9a01” library which was not in the circuitpython library bundle.
I copied the contents of this file.
https://github.com/tylercrumpton/CircuitPython_GC9A01
Into a file on the root folder of the rp2040.
.
├── code.py
├── gc9a01.py
└── lib
fonts: Glyph Bitmap Distribution Format (BDF)
Finally, I did not have the font. mfbold.bdf
I elected to change the font used in the code, since I didn’t have that file anyway. I used Spleen, and the font size 16 width by 32 height pixels.
https://github.com/fcambus/spleen
https://raw.githubusercontent.com/fcambus/spleen/master/spleen-16×32.bdf
Looking at the internet code,
bitmap_font.load_font("font/mfbold.bdf")it expects the font in the folder “font” on the root folder (you can actually put the BDF anywhere you want). So I created a “font” folder and put the Spleen bdf file in there. Finally I changed the “load_font” in the internet code.
bitmap_font.load_font("font/spleen-16x32.bdf")final folder structure
owls@owls:/Volumes/CIRCUITPY$ tree -L 2
├── code.py
├── font
│   └── spleen-16x32.bdf
├── gc9a01.py
├── internet_copy.py
└── lib
├── adafruit_bitmap_font
├── adafruit_display_text
└── adafruit_gfx
Hurray!
Note: on linux the filepath is under “media”, e.g.
/media/owls/CIRCUITPY$final code
I stripped out the IMU code, since I’m not interested in it for a hello world. Therefore my final code file:
(See link to zip file at the bottom)
hexadecimal font fun: more unicode cats _ฅ^•ﻌ•^ฅ_
The font file does not contain ALL the unicode ever, since microcontrollers are short on space. (The spleen is already a huge 238kb).
Therefore when I tried to display the unicode cat “_ฅ^•ﻌ•^ฅ” the microcontroller skipped the ฅ and the ﻌ characters.
Fortunately The BDF file format is straightforward ! So we can just manually add one or two characters.
Literally it is 1s and 0s. Here’s an example. (I’ll explain how I got this picture in a moment)
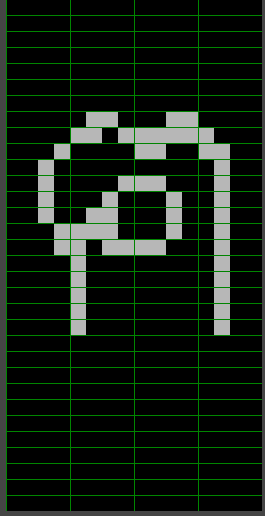
The first row is all 0’s. So it would look like
0 0 0 0
This happens for several rows.
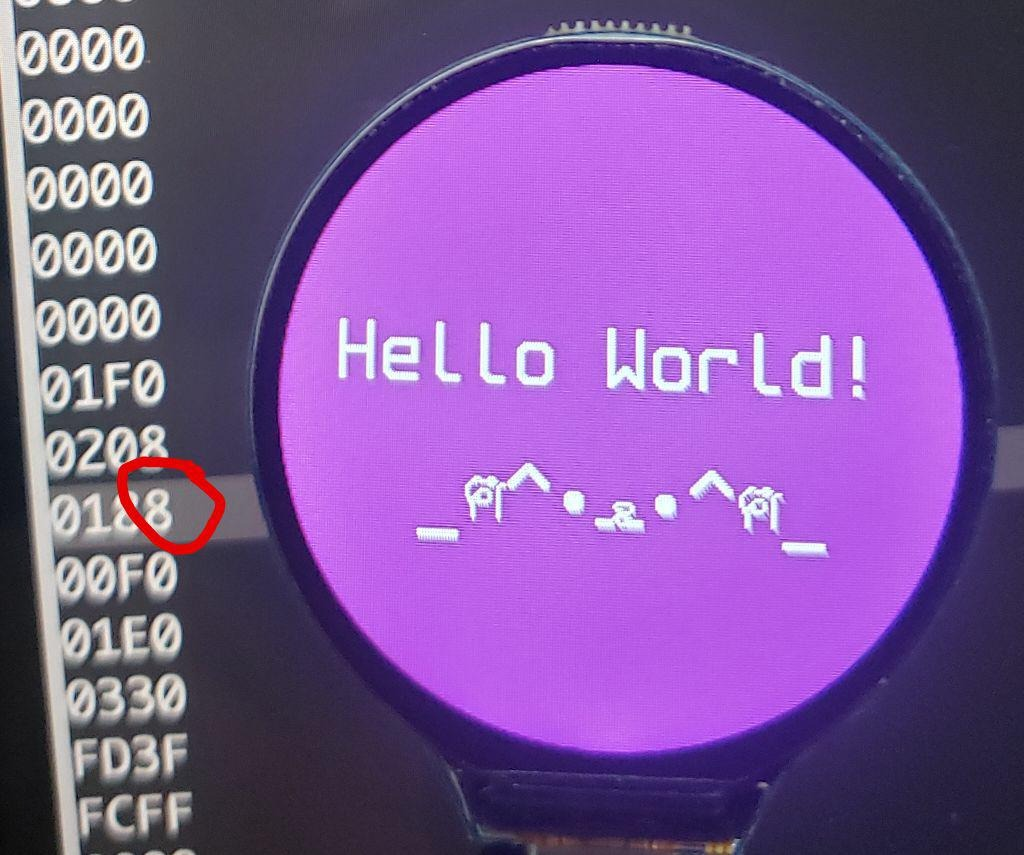
Now let’s look at the row I highlighted in red.
If you read off the pixels, it’s
[0 0 0 0] [0 1 1 0] [0 0 1 1] [0 0 0 0]Now in decimal that’s
0 (4+2) (2+1) 0
0 6 3 0
And that’s one row in the BDF file! done 🙂
hexadecimal
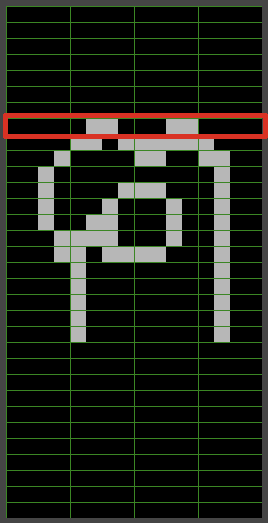
There’s just one trick, which is that there are 16 possible combinations, so we use hexadecimal instead. So if we look at the orange row, we have
[0001] [1110] [0010] [0100]Which is in decimal
1 (8+4+2) 2 4
1 14 2 4
Now we need to turn the 14 into a single character, a.k.a. in hexadecimal. So we have 0 to 9, then we know that 10 = A, and 16 = F. So we have
1 D 2 4for this row.
Anyway, so at the end, we have a cat’s paw 🙂
Oh, and finally, for the BDF to work properly we also need the unicode number (?).
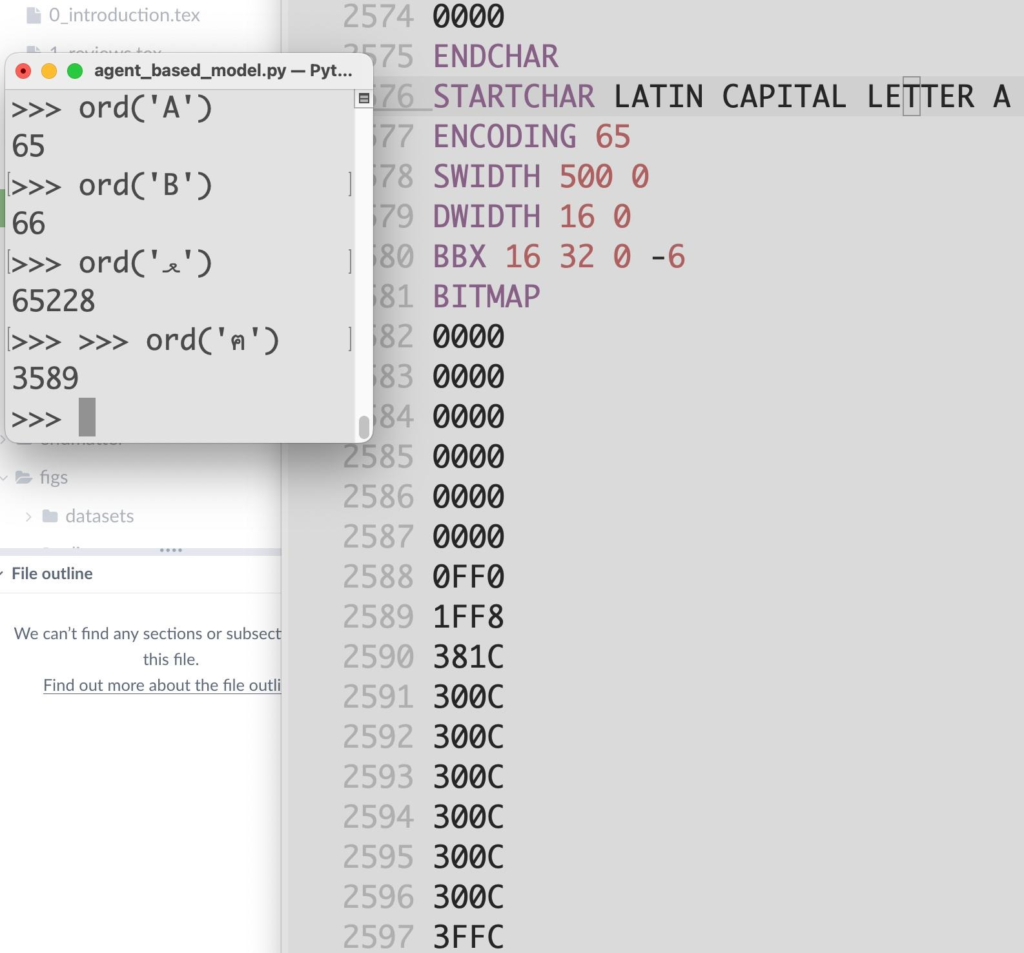
So you’ll see the in the BDF file lines like this:
STARTCHAR LATIN CAPITAL LETTER A
ENCODING 65
This corresponds to ASCII.
STARTCHAR LATIN CAPITAL LETTER B
ENCODING 66
The Spleen font goes pretty far down the unicode, but didn’t have these characters. So then I looked up the number using python’s ord() function. Looking up the codepoint using the ord function (can e.g. be used to look up ascii table)
ord('A')
65
ord('B')
66

ord('ฅ')
3589
ord('ﻌ')
65228
Hurray! All done.
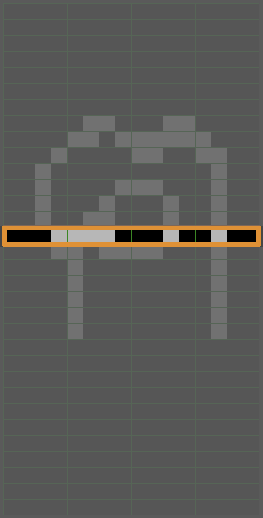
example of error
if you look at the 8… I originally had a 9 there. So …
… my cat ended up with a nostril !
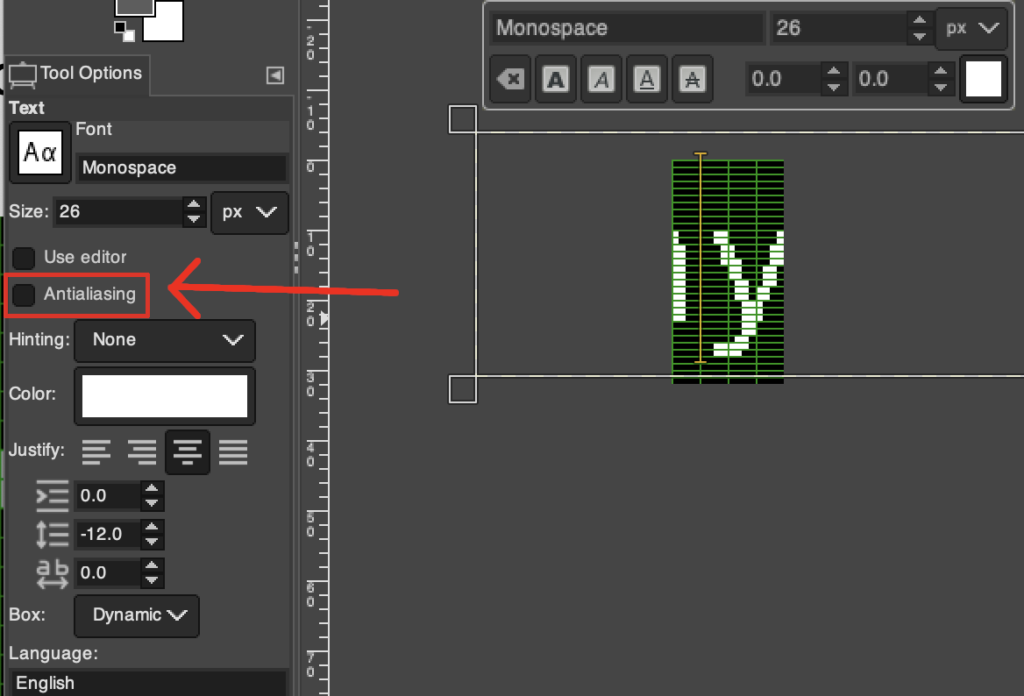
How to set up GIMP
Well, you simply type the character into GIMP, set an approximate font size, and then do a 4×1 grid to help. (I also used a “y” character to roughly line up the character vertically, fortunately it’s very easy to shift characters up and down — just add or subtract lines of 0s.
Also, turn off anti-aliasing.
Go to View -> Show Grid. Also, go to Image -> Configure Grid. You want a 4×1 pixel grid to easily read off the hexadecimal
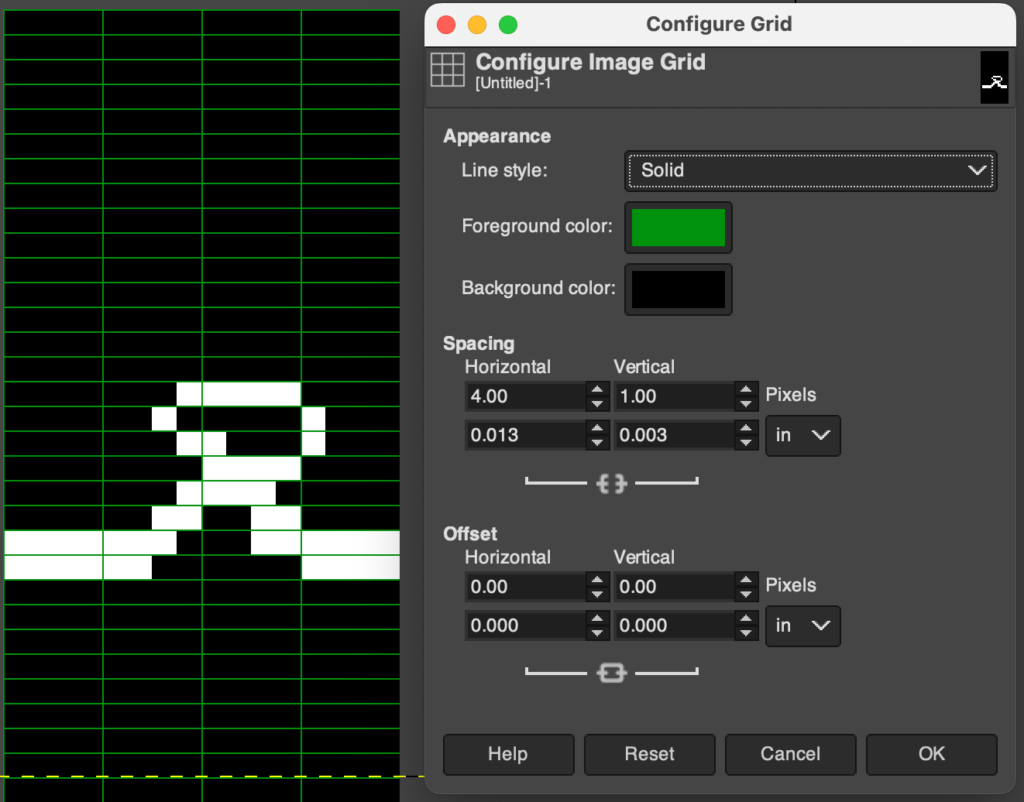
(Note: you can click the lock/link icon below the spacing, so that you can adjust the height without adjusting the width).
Debugging
Debugging is fun!
On Mac,
$ brew install minicom
$ minicom -D /dev/tty.usbmodem101
Linux:
$ apt install minicom
$ minicom -D /dev/ttyACM0
(You can check the port with $ ls /dev/tty*)
Your rp2040 will be running your code. So then to get to a prompt (REPL), hit ctrl-C, and you should see:
Adafruit CircuitPython 8.1.0 on 2023-05-22; Waveshare RP2040-LCD-1.28 with rp2040
>> print('hi')
hi
Now if you hit ctrl-c again, it will reboot and try to run your code again, but this time you can see the error messages also.
0;🐍Done | 8.1.0soft reboot
Auto-reload is on. Simply save files over USB to run them or enter REPL to disable.
code.py output:
0;🐍code.py | 8.1.0Traceback (most recent call last):
File "code.py", line 1, in
ImportError: no module named 'machine'
0;🐍1@code.py ImportError | 8.1.0
Code done running.
Traceback (most recent call last):
File "code.py", line 1207, in
File "code.py", line 1193, in main_menu
File "code.py", line 1047, in banner_demo
File "adafruit_bitmap_font/bitmap_font.py", line 47, in load_font
OSError: [Errno 2] No such file/directory: font/mfbold.bdf
0;🐍47@adafruit_bitmap_font/bitmap_font OSError | 8.1.0
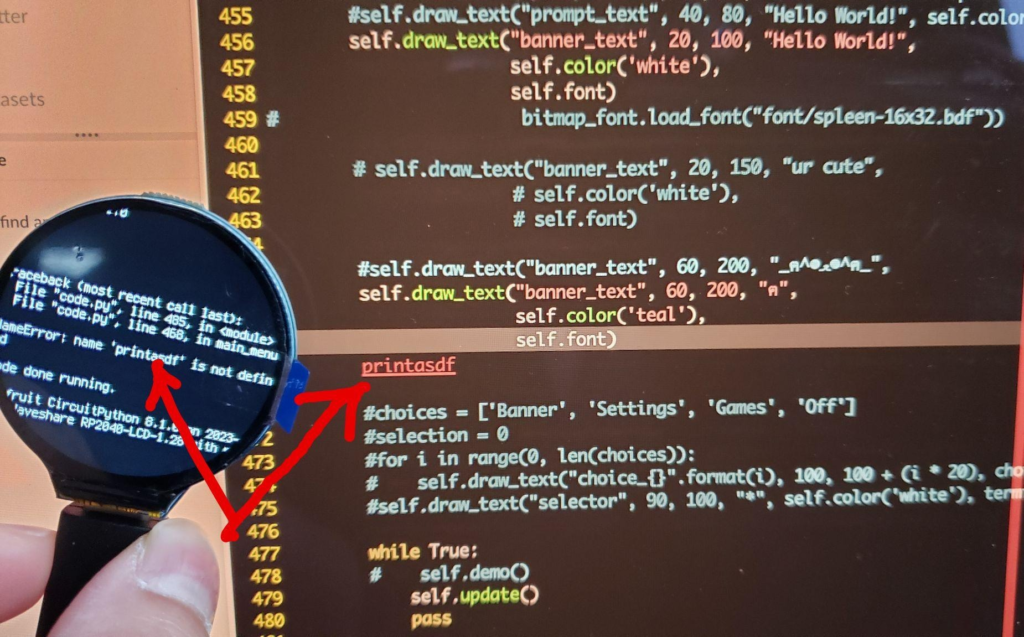
The funny/awesome thing is that with an LCD screen you can also see the error displayed:
0;🐍Done | 8.1.0soft reboot
Auto-reload is on. Simply save files over USB to run them or enter REPL to disable.
code.py output:
0;🐍code.py | 8.1.0Traceback (most recent call last):
File "code.py", line 1, in
ImportError: no module named 'machine'
0;🐍1@code.py ImportError | 8.1.0
Code done running.
Traceback (most recent call last):
File "code.py", line 1207, in
File "code.py", line 1193, in main_menu
File "code.py", line 1047, in banner_demo
File "adafruit_bitmap_font/bitmap_font.py", line 47, in load_font
OSError: [Errno 2] No such file/directory: font/mfbold.bdf
0;🐍47@adafruit_bitmap_font/bitmap_font OSError | 8.1.0
The funny/awesome thing is that with an LCD screen you can also see the error displayed:
reference: here are the files as a 173kb zip
these would go onto the CIRCUITPY usb drive
Hey NOUYANG!
Great work you are doing here!
In reference to an old project you were working on, we (a team of Egyptian engineering students) are currently working to build a full-scaled vending machine. We saw you have done a small wooden one but based on the other post you have made, you seem to rock it and have a big background in your engineering field. We are just wondering if you can assist us in some issues we are facing in our project.
Thank you very much
& Keep Up the Good Work
Hello! I’m sorry, I just saw this. I think there are other (better) tutorials out there nowadays, e.g. on instructables, but feel free to email me if you have specific questions. Thanks for the kind words and same to you all, hope you all are having fun with engineering!