I decided IAP started, which means it’s time to give up on work and just do side projects. Thanks to my earlier blog post listing, I had a concrete set of projects to work through. And thanks to the largess of my roommate, we had a nice working 3d printer (ender 6). so finally i could 3d print the yoyo shell (as opposed to 2.008, getting a cnc mill to cut an aluminum mold for thermoforming and injection molding, 3d printing is much easier). in fact the entire yoyo is 3d printable apparently, so i didn’t even need to buy more things from the hardware store, removing almost all friction from re-starting this project. (additional friction removal supplied by stealing supplies from ee friends)
specifically this design: https://www.thingiverse.com/thing:1766385
that adafruit circuit playground pcb design is so close to what I want, i wanted to just buy the circuit directly and just build it. sadly what i want are radial LEDs, not ones arranged in a circle, for the PoV display.
mechanical structure
what i finally understood after printing it (re: how to do it without any hardware, like most 3d prints ask you to get some nuts or bolts at least): you can print threads into plastic directly, which are enough to screw into one side of the yoyo., and the other side of the nut can be glued in, with a hex design to retain so it doesn’t unscrew itself. the nut itself can be hollow so you can pass a battery cable from one side to the other.
circuitpython
ok so that was the mechanical structure. now for the electronics and programming. my friend supplied an rp2040 (adafruit version) to play with and convinced me to try circuit python.
it’s so great. admittedly at first it was very frustrating, as i accidentally sent one board into safe mode so it wouldn’t show up as a usb, and then i downloaded the wrong circuitpython (the naming is sooo confusing) so i would drag the file onto the “usb drive”, the usb drive would disappear, but never show up again as “circuitpython” drive. so i would have to hold down boot-select-whatever again to get it to show up as a drive again. and i tried nuking the flash too. eventually i realized that
“adafruit-circuitpython-raspberry_pi_pico-en_US-7.0.0.uf2“
is not the one i wanted but rather
“adafruit-circuitpython-adafruit_feather_rp2040-en_US-7.0.0.uf2”
which, what. =____= such confusing naming.
nicely enough the adafruit rp2040 board takes lipo input (has jst connector) directly, and programs over usb-c. whoooo
breadboard and throughhole
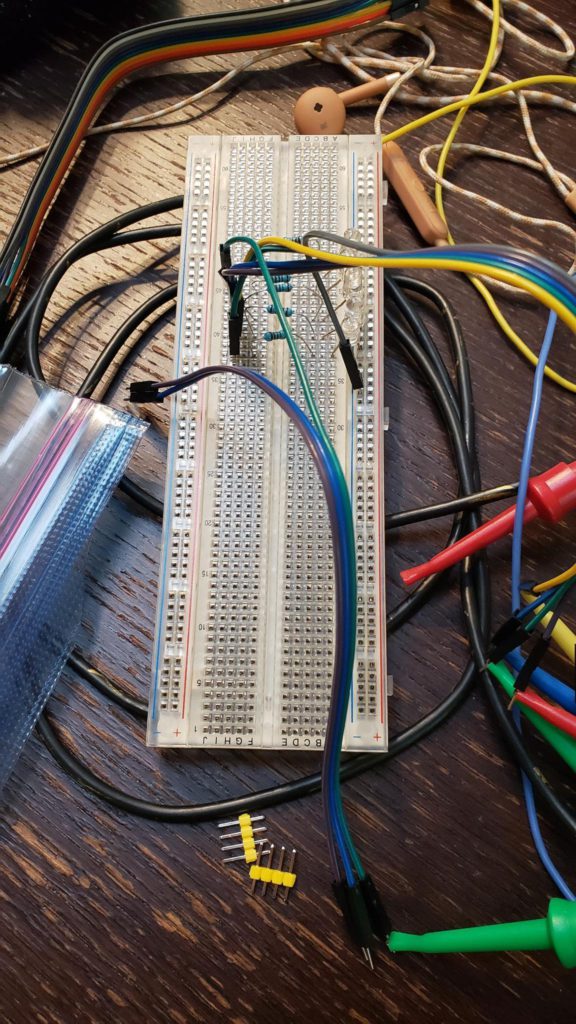
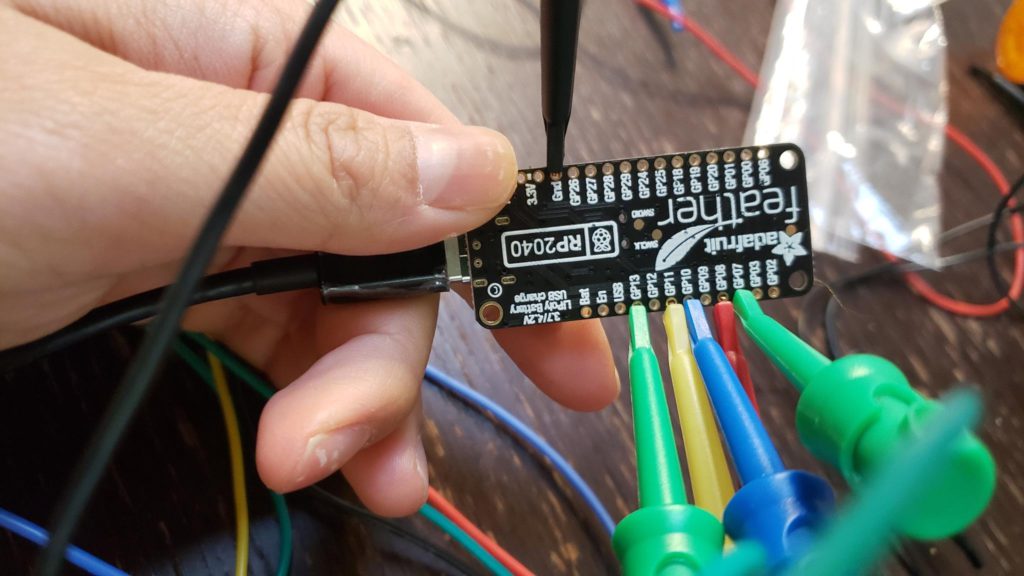
so to start with, a breadboard and some standard throughhole LEDs. i used quick clips directly on the rp2040, connected to some male-male headers, and put 5 LEDs on the breadboard (with some 1k resistors).
I used the code form the lucky cat PoV and it … just worked! Yay!
I did run into some confusion (i think syntax differences between micropython, which code I stole uses, vs circuitpython?), in the end I made the modifications like so:
import time
import board
import digitalio

p1 = digitalio.DigitalInOut(board.D13)
p2 = digitalio.DigitalInOut(board.D11)
p3 = digitalio.DigitalInOut(board.D10)
p4 = digitalio.DigitalInOut(board.D6)
p5 = digitalio.DigitalInOut(board.D5)

LEDS = [p1,p2,p3,p4,p5]

for LED in LEDS:
    LED.switch_to_output()

[... most lines same as lucky cat pov code ... ]

def display(message, duration=150, duty=585, length=101):
    #motor.duty(duty)
    dispm = build_message_display(message, length)
    for n in range(duration):
        for line in dispm:
            for p, v in zip(LEDS, line):
                if v:
                    p.value = True
                else:
                    p.value = False
                #p.on() if v else p.off()
            time.sleep(0.001)

    #motor.duty(0)
while True:
    display('dood')
popsicle stick and smd
My original plan was to mimic the yoyo spin with one of those tiny brushed dc motors, however after this success i decided to move straight to the yoyo.
fortunately i had eaten some boba ice cream (thanks costco) and saved the popsicle stick just in case.
with the pressure of hacking together a demo, it removed all my normal thinking decision making issues (what headers to put on my micro? what will my cool friends think of the way i implemented this?) in favor of “what is the dumbest way i can get this done”. so … don’t question what i did too much lol
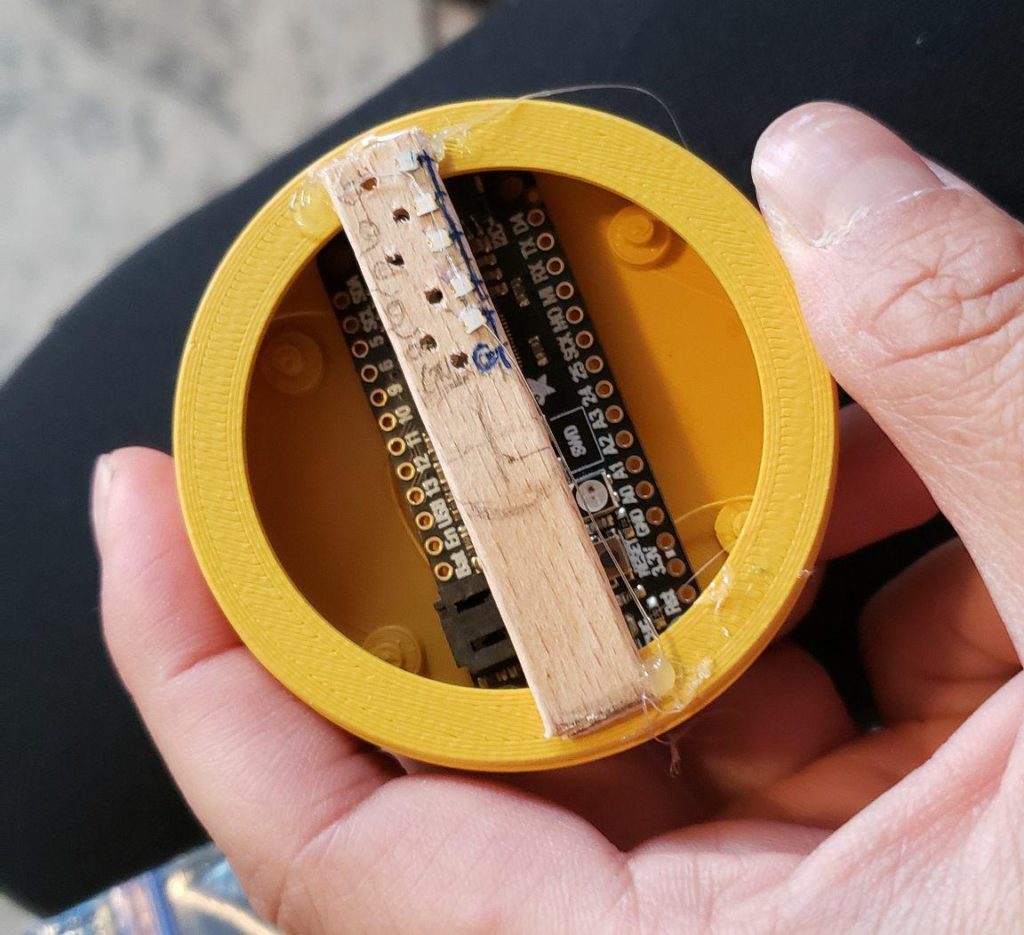
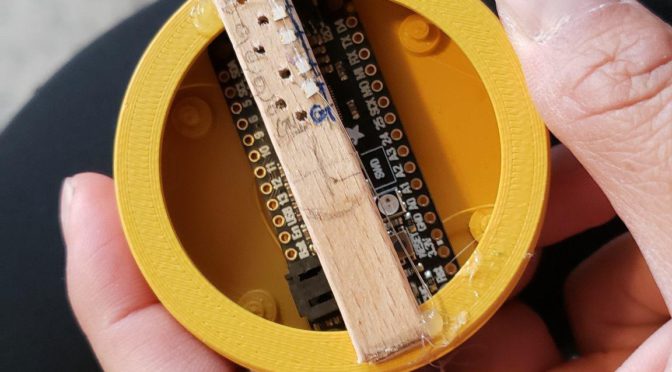
i snapped the popsicle stick, drilled the holes, stuck the SMD LEDs on with superglue, then put in resistors. i used hot glue to hold the throughhole resistors so that they wouldn’t move around and rip out the pads from the surface mount LEDs.
soldering was a small disaster.
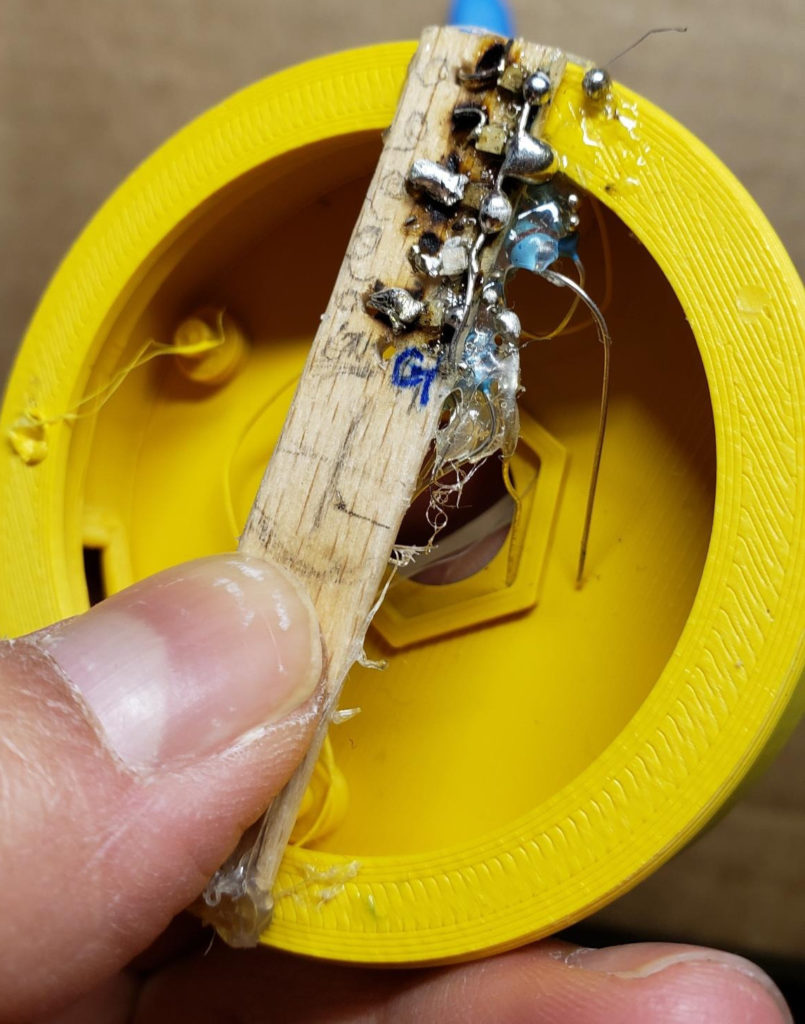
rip
i had no lipo, so i went to microcenter (!) to get one in person (!) unfortunately the smallest size they had was still quite large.
apparently i managed to get some actual solder joints in there, and the code just worked
then i hot glued the battery in. the feather was kind of a “press-fit” already, and the popsicle stick rested on the resistor legs.
the heavy battery on one side made the yoyo spin pretty wildly, so it was not possible to see what was going on.
to try to see what was going on, i stuck it on a drill (with some nice double stick tape) and spun it around. this double stick tape is amazing, i keep finding uses for it, it can almost entirely replace hot glue and look better.
hmm. not very legible.
thoughts on next steps
my conjecture is that normally on a rotating object the words go around the circle, such that the base of the letters is the center of the circle. but since i adapted the lucky cat code, the sides of the letters are actually facing the circle.

what the lucky cat code does 
this is ilkely to be more legible when spun
i’ll save for a future update, but since the code was in python, it was super easy to figure out what was going on with the data structures. the lucky cat code actually has extra logic to flip the letters sideways, so it was straightforward to just take out that logic. (will save for future post)
with a bit of simple python code YAY NOT ARDUINO C we can see what what’s going on. on the left is output from the original code, and then i did some minor mods to get the right.
def convert_to_stdout(list_onoffs):
    result = []
    for line in list_onoffs:
        result.append(['▫ ' if c==0 else '▪ ' for c in line])
    printout = [' '.join(line) for line in result]
    for line in printout:
        print(line)
original code (lucky cat code) 
code after some quick surgery
the upshot of this though is that if i want to try the second method, i will need 7 LEDs, not 5 LEDs 0: because the letters are each 5×7, and now they’re rotated

i found some batteries. the mini drone batteries have … mini jst. fortunately i dug around a bit and found a jst connector, so now to solder. and not cut across both battery leads with a scissor and short circuit the battery.
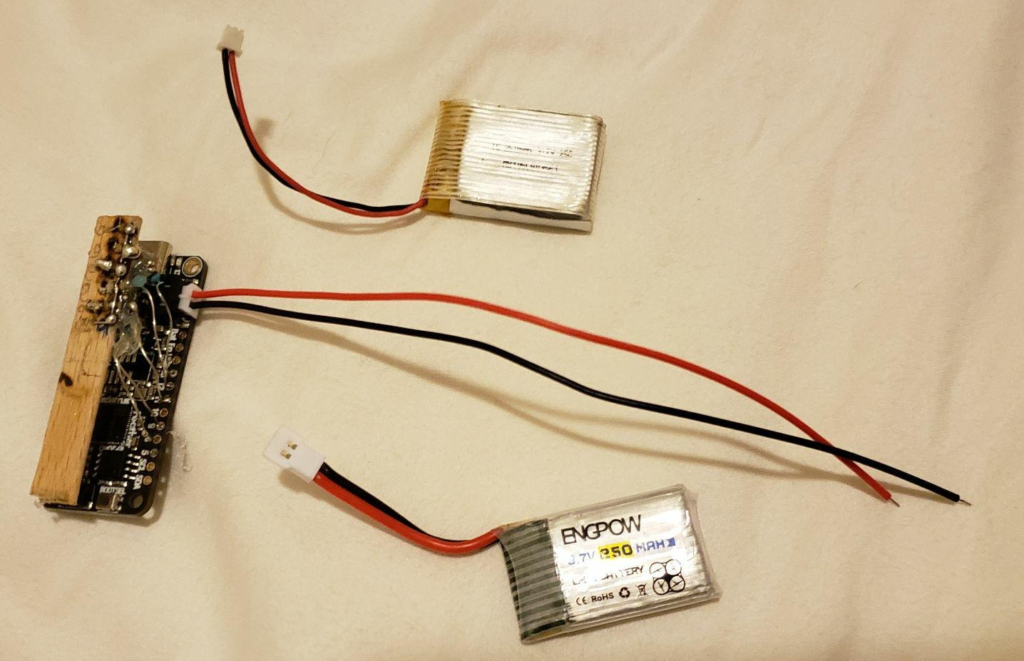
so, next steps; smaller battery, more LEDs, (maybe one day RGB LEDs?), new code, and maybe new shell when i’m ready.
not bad for 2 days-ish of work, hopefully i can stick through with this and turn it into a nice looking/working project instead of the hackish state most of my project end in.
other thoughts
A few questions arise, I did some back-of-envelope math while sitting on a plane (i did, in fact, fly despite the omicron). I don’t think I ever installed MathJax on this wordpress instance but eh for now.
Q: What rpm does a yoyo spin at?
If we think of it just as a falling object (don’t consider conservation of momentum etc.) just to get back of envelope, With no rotation, an object starts at 0 m/s, and after 1 second it has fallen 4.9 m.
>>> d = v0 t + (1/2)a*t^2
>>> where a = g = 9.8 m/s^2
Now for the yoyo, if a yoyo has a 1 cm diameter, it’s around 3 cm circumference.
>>> C = pi * d
Thus when yoyo falls 3cm, it’s made 1 revolution in order to unwind that much string. So to fall 4.9 m, it’s made ~100 revolutions.
>>> 4.9m * (1/0.03) rev/m ~= 100 revs
This took 1 second to fall 4.9m. So the yoyo has averaged ~100 revs / second. This is about 6000 rpm.
>>> 100 rev/sec * 60 sec/min = 6000 rev/min
I guess that if a human is throwing it will spin faster though.
Note: The other way is to measure it empirically. I have a Samsung Galaxy S9, which has a super-slow-mo mode which according to the internet runs at 960 fps. This should be fast enough, if we use the above calculations I should be able to get around 9 frames of the yoyo spinning before it completes a circle.
> Note: I started on this, it does appear the yoyo falls a lot slower than normal object, because it has to twirl around a large inertial mass in order to fall. TBD then, I’ll take a slo-mo video of a yoyo and another object falling side-by-side.
Q: Is an Arduino fast enough?
I had a friend work on a persistence-of-vision project and ended up needing to switch processors, which stalled out the project. Is an Arduino fast enough?!
The answer is yes, I’m driving like 6 LEDs, they were driving like a couple hundred RGB LEDs lol. I looked a bit into the individually addressable RGB LEDs & IMUs, which seem to run around 8 KHz for the LEDs, the normal IMU MPU-6050 can be sampled at 400 kHz, and the basic Atmega328 runs at 16 MHz. IDK why I was concerned when the v0.1 I wrote on an attiny. And for the yoyo itself, 5k rpm is only 83 Hz, so that should be plenty fine too.
here is some other notes of stuff i learned from my knowledgeable ee friends (who nicely don’t make fun of me for my basic questions):
so the ws2811 uses a 800khz clock, takes 24 bits for one led
so assuming naive bitbanging of the protocol without timers (not true with lib but conservative)
so 30us to address one led
150us for 5 leds
80hz refresh rate gives a time budget of 12,500us
so you have a very large margin even if you manually bitbang the protocol
somehow I had assumed that bitbanging was super fast, like in my head it felt like “let me drop from C to assembly to get max speed” but it’s not analogous at all
I’m assuming the most naive bitbanging implementation that looks like:
write(1)
sleep(high_time)
write(0)
sleep(low_time)
the sleeps can be interleaved with your code by using timers and such, but the sleep way is definitely slowest and easiest to analyze

