All posts by nouyang

Getting started with AprilTags on Ubuntu 16.04

I recently started working with April tags, since they seem cool & you see them all over the place (used as fiducials for robots trying to walk around a somewhat unstructured environment).

oto-robot-atlas-nowej-generacji-od-boston-dynamics_6066

the internet fell short (feel free to skip this section)

It was surprisingly hard to find instructions to get started, my search-fu was failing me. My search results turned up the original “official” website from the April Robotics Laboratory at University of Michigan, https://april.eecs.umich.edu/software/apriltag.html

This had no “getting started” instructions on it. Same for the C++ wrapper by a researcher at CSAIL (now a professor who I met at CMU!) https://people.csail.mit.edu/kaess/apriltags

And same for the ROS wrapper around the Apriltags, which also confusingly seems to have several version that may or may not now be the same. http://wiki.ros.org/apriltags_ros and https://github.com/xenobot-dev/apriltags_ros

(oh wait neat, there are instructions at https://cmumrsdproject.wikispaces.com/AprilTags_ROS). However, I’m still not terribly familiar with ROS, so I wasn’t too enthused about using this wrapper.

Fortunately Patrick over at Kuindersma’s lab above me was able to get me started.

getting started

  1. Download and install C++ wrapper as per instructions at https://people.csail.mit.edu/kaess/apriltags/
    See below:
  2. sudo apt-get install subversion cmake libopencv-dev libeigen3-dev libv4l-dev
    sudo port install pkgconfig opencv eigen3
    svn co https://svn.csail.mit.edu/apriltags
    cd apriltags
    make
    ./build/bin/apriltags_demo
  3. Yay, now a window pops open (see “troubleshooting” if it doesn’t, as was the case for me) with a video stream. But we need tags for it to recognize!

Getting tags

I actually found this pretty annoying, the zipped files on those sites give you a thousand options and it’s not clear which ones will work. So for me, I actually had my friend give me four tags that definitely work.

ID = #0 #1 #6 and #7 tags.

  1. Print out tag
  2. Run
    ./build/bin/apriltags_demo
  3. Now stick the tag in front of your camera. In the videostream you should now see a circle. In the terminal you should now see data streaming out.
  4. The data display shows distance (from the camera to the tag), the xyz location of the center of the tag, as well as the roll, pitch, and yaw. These coordinates will depend on which side you put pointing up when you pasted the tag on, so beware.  In fact, none of the data should be taken as absolute until you calibrate your camera.
2 tags detected: 
Id: 1 (Hamming: 0) distance=0.079741m, x=0.000532, y=0.006102, z=-1.487915, yaw=-0.134615, pitch=0.071828, roll=-0.041146
Id: 7 (Hamming: 0) distance=0.079741m, x=0.000532, y=0.006102, z=-1.487915, yaw=-0.134615, pitch=0.071828, roll=-0.041146
14.9312 fps
apriltag
Two apriltags
apriltag_demo
Example output

calibrate camera

I wandered for a while lost in the lands of https://docs.opencv.org/2.4/doc/tutorials/calib3d/camera_calibration/camera_calibration.html

Fortunately, eventually I found my way to a python library that made the whole process super simple. I ignored the above link (to official openCV docs) entirely. Instead, I used the following python package. All I had to do was print out the checkerboard pattern included in the repository, wave it in front of the camera and record a short video, run the python file, and bam! I had the configuration.yaml file I needed.

https://github.com/smidm/video2calibration

To get it working, I did have to make sure I had pyyaml installed
 (venv) nrw@earlgrey:$ sudo -H pip install pyyaml --upgrade

This project is super awesome and included an example you can run right away and inspect. The following line, run in the root takes in the video included in the repo (chessboard.avi) and outputs the resulting configuration file to “calibration.yaml”.

(venv) nrw@earlgrey:~/projects/video2calibration$ ./calibrate.py example_input/chessboard.avi calibration.yaml --debug-dir out

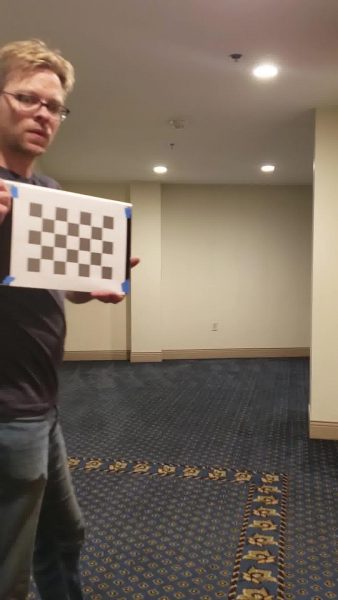
At this point I printed out the checkboard pattern included in the repository, put it on a stiff surface, and then opened cheese (you don’t have to use cheese, we just need to record a video).

Then I waved my board around in front of the camera and recorded a short video.

0320

wheeeeee
0260

Anyhow, I record ten or fifteen seconds of video. Then I ran

nrw@earlgrey:~/projects/video2calibration$ ./calibrate.py ~/Videos/Webcam/2018-03-26-112657.webm calibration.yaml --debug-dir out

Performing calibration...
 RMS: 0.442700776066
 camera matrix:
 [[ 666.78668352    0.          343.73827809]
 [   0.          665.79103853  227.19081685]
 [   0.            0.            1.        ]]
 distortion coefficients:  [  6.06301194e-02  -1.94620209e-02   1.45555284e-04   1.24410189e-03
 -2.51439333e-01]

Input calibration parameters into source code

Edit into the demo file

nrw@earlgrey:~/projects/apriltags/example$ vi apriltags_demo.cpp

Specifically, we want to change the following section. Note that we are using the definition of the rotation matrix to pull out (from the calibration.yaml output) the focal point and principal point parameters.

public:

  // default constructor
  Demo() :
    // default settiwgs, most can be modified through command line options (see below)
 [...excerpted section...]
    m_width(640),
    m_height(480),
    m_tagSize(0.00944), // in meters
    m_fx(667), // in pixels
    m_fy(666), //
    m_px(344), // principal point
    m_py(227),

Ah! I forgot, we also needed to measure, using a ruler (or calipers), the size of the apriltag in real life. So just measure one of the sides of the tag (which should be square…) and put it inoto m_tagSize. (The width and height should be the size in pixels of the image from the video camera).

Compile and run (use “make clean” if the build fails, then run “make” again)

nrw@earlgrey:~/projects/apriltags/example$ cd ..
nrw@earlgrey:~/projects/apriltags/$ nrw@earlgrey:~/projects/apriltags/example$ make

Then run the program:

nrw@earlgrey:~/projects/apriltags/$ ./build/bin/apriltag_demo

One easy way to double-check whether the camera is roughly calibrated is to physically measure the distance between the camera and the tag, and then compare to the “distance” output in your terminal. Hopefully they match…

Units

The roll, pitch, and yaw are reported in radians. To convert into degrees, multiply by 57.3 (approximately).

Framerate

A framerate of 17fps or so is totally reasonable, since the apriltags demo is decently compute intensive. I had a problem with lag, where the video ran smoothly but with a significant lag — this may have been a result of me running the entire thing in a virtual machine. Let me know if you don’t have lag!

Troubleshooting

I had a somewhat frustrating beginning where I couldn’t get the example program to run.

-- Found OpenCV: /opt/ros/lunar (found version "3.3.1")
 framerate (17fps raesonable, but lag???)
 output is in radians
 9.23346 fps
 0 tags detected:
 0 tags detected:
 0 tags detected:
 0 tags detected:
 0 tags detected:
 0 tags detected:
 0 tags detected:
 0 tags detected:
 1 tags detected:
 OpenCV Error: Assertion failed (mtype == type0 || (((((mtype) & ((512 - 1) << 3)) >> 3) + 1) == 1 && ((1 << type0) & fixedDepthMask) != 0)) in create, file /tmp/binarydeb/ros-lunar-opencv3-3.3.1/modules/core/src/matrix.cpp, line 2542
 terminate called after throwing an instance of 'cv::Exception'
 what():  /tmp/binarydeb/ros-lunar-opencv3-3.3.1/modules/core/src/matrix.cpp:2542: error: (-215) mtype == type0 || (((((mtype) & ((512 - 1) << 3)) >> 3) + 1) == 1 && ((1 << type0) & fixedDepthMask) != 0) in function create
Id: 15 (Hamming: 1)Aborted (core dumped)

It turned out that because I had ROS installed, or perhaps also because I installed the “apriltags” ROS wrapper, I was having openCV version conflicts.

/tmp/binarydeb/ros-lunar-opencv3-3.3.1

vs

nrw@earlgrey:~$ pkg-config --modversion opencv
 2.4.9.1

To solve, I simply had to edit one line in the CMakeLists.txt to force it to use the right version of openCV. I added an “exact required” tag, along with my openCV version (2.4.9.1), to the appropriate line.

nrw@earlgrey:~/projects/apriltags$ vi CMakeLists.txt 
(line 14)
find_package(OpenCV 2.4.9.1 EXACT REQUIRED)

Then I ran “make” and

nrw@earlgrey:~/projects/apriltags/$ ./build/bin/apriltag_demo

and the example program worked! Huzzah.

the end.


How to create a timelapse (both timed pictures and post-processed video) live viewable

edit: Note that physically, the set-up is that I have an extra desktop which is always on and connect to the internet which is running Ubuntu (16.04).  I have an external webcam. This also requires a dropbox account.

I’ve often wanted to monitor something remotely, but have had issues in the past trying to set up a video stream. For monitoring experiments remotely (or for instance a 3d printer), I really don’t need 30 frames per second.

I suppose nowadays, in theory I could set up a youtube live stream, especially since I could just disable audio. But for more control over the end result, my solution is a one-liner bash command, combined with a dropbox account.

I was having a terrible time with all my search results describing ways to create a timelapse animation, instead of detailing how to take the pictures for the timelapse in the first place.


use streamer

streamer -c /dev/video1 -t 10 -r 1 -o 0000.jpeg &

The settings for the above command are as follows:

  • Using the “second” camera (ince my desktop has a built-in webcam mapped to /dev/video0, whereas I wanted to take pictures with a USB webcam)
  • 10 frames total
  • 1 frame a second (rate)
  • Name starts at 0000.jpeg (it will automatically count up)
streamer -c /dev/video1 -t 300 -r 0.0033 -s 640x480 -o 0000.jpeg &

i used the first command to test whether the command is working.

  • For the actual timelapse, I wanted to take a picture every 5 minutes, or in other words every (1/360 = 0.0033) seconds. (I don’t think there’s an option to define the rate in anything other than seconds).
  • I wanted about 24 hours of timelapse. At every 5 minutes, I take 12 an hour or 12*24 a day, so around 300 frames
  • Streamer was defaulting to 320×240 pixel images, so I asked streamer to instead take 640×480 pictures, which are what my webcam supports.

timelapse

Note: I did not really play around with this, but I think you can also create video with streamer, e.g.

streamer -c /dev/video1 -t 0:30 -o movie.avi -f jpeg

installing headless dropbox

Following the online instructions from the dropbox site

cd ~ && wget -O - "https://www.dropbox.com/download?plat=lnx.x86_64" | tar xzf -
Run the synchronizer
~/.dropbox-dist/dropbox

making the timelapse persistent

screen allows our session (within which we are running streamer) to persist, even if someone closes the terminal window.

Screen Basic commands:
screen -r (reattach)
screen -d (inside screen session, to detach)
ctrl-shift-w

ctrl-a w (list windows)
ctrl-a 1 (switch to window #1)
ctrl-a c (new window)
exit (close window) — after last window is closed, screen terminates.

Commands to handle background process

For instance, if you messed up your settings and streamer is now taking 300 frames at a rapid rate,
$ ps x | grep streamer
$ sudo killall streamer

Putting it all together

$ nohup ~/.dropbox-dist/dropboxd&
$ screen
> cd ~/Dropbox
> streamer -c /dev/video1 -t 300 -r 0.0033 -s 640x480 -o 0000.jpeg &

Now, I can access my setup online at dropbox.com. I can also use the “share folder using link” option on dropbox to share with multiple people.

Make a QR code

This was purely for fun, but I turned the dropbox link into a QR code which I printed out and stuck next to the experiment

ducky_screenshot

Protips

I find it really handy to include labeling information not just in the filenames but also physically in the image. Below you can see I labeled the image with the date of the timelapse.0233

Making a timelapse (animation / video of the resulting images) using ffmpeg

Use ffmpeg.

 cat *.jpg | ffmpeg -r 20 -f image2pipe -i - output.mp4

Takes all jpg files and turns it into an mp4 with 20 frames per second.

I was having a lot of issues following the instructions online, but somehow using the image2pipe solved everything. (I was getting errors like “would you like to overwrite this .jpeg file y/n”).

[~/Downloads/buse/rotate]$ ffmpeg -framerate 1/2 -i *.JPG -c:v libx2^C -r 30 out.mp~4
File '0010_rotated.JPG' already exists. Overwrite ? [y/N] nNot overwriting - exiting

https://en.wikibooks.org/wiki/FFMPEG_An_Intermediate_Guide/image_sequence

One thing that surprised me on this page, is that a common command such as “all images in this folder” is a little trickier than I’d expect. (I was working with another set of images that used timestamps as filenames, instead of an orderly 0001.jpeg like other examples onlin).
1) You must use “glob option”
2) You must surround your search pattern in quotes

 ffmpeg -pattern_type glob -i "image-*.png" video.webm

note to self: to rotate all images in a directory 90 degrees clockwise:

for file in ./*.jpg do
 convert "$file" -rotate 90 "${file%.JPG}"_rotated.JPG
done

There you have it!

Thanks to the one-liner “streamer” command, and by using dropbox as a syncing service. you can accomplish a real-time viewable timelapse with just 4 or 5 lines of code, and then use just one more line to create a video of the resulting images.

$ nohup ~/.dropbox-dist/dropboxd&
$ screen
> cd ~/Dropbox
> streamer -c /dev/video1 -t 300 -r 0.0033 -s 640x480 -o 0000.jpeg &
 cat *.jpg | ffmpeg -r 20 -f image2pipe -i - output.mp4

Drawing Automata and the History of Computer Science

Note: This is mostly for me to remind myself of the name of the drawing automata that I still love to look at videos of and wonder at how amazing it is.

https://www.youtube.com/watch?v=bY_wfKVjuJM


Currently I’m taking this Computer Science 191: Classics of Computer Science, where we read a bunch of famous papers tracing the evolution of computer science.

Today we talked about the Analytical Engine. (Lovelace wrote the lengthy “Notes” part which takes up the bottom 2/3). Some people at my table thought it was crazy to go from an abacus to this complicated setup. Due to my interest in mechanical engineering and robot art, I knew of this mechanical writing machine where you could slot letters in and out. I thought this was Maillardet’s (so 40 years before Babbage), but I think the letter-selecting device is actually from Jaquet-Droz automata.

The video I remember is the BBC one.

jacquardbbcdetail

Anyhow, these were made to sell more watches (at least according to wikipeida)! Just some bored watchmakers, making crazy intense automata.

Here is another documentary which explains in the first 5 minutes or so how Jaquet made little dioramas with mechanically spinning and quacking birds (really, reminds me of the Fabergé eggs!), traveled and got a bunch of money after waiting months to see a king, and then got to go make complicated things like this automata.

jacquard

Maillardet’s is at the Franklin Institute in Philadelphia. Here is some more about it from FI. Here’s a CBS show about it. Apparently it is possible it has the most “read-only memory”, about 300 kb.

Also apparently the drawing automata in Hugo was created in real life! This pleases me immensely.

Oh yea they also passed around some Jacquard’s loom punchcards. I don’t know much about weaving and so the complexity of programmable looms goes over my head, but I think the drawing automata makes it really easy to comprehend how complicated these things can get. At least, it really impressed the folks at my table 🙂

jacquardpunchcard jacquardpunchcarddetail


What else… oh I learned what squaring the circle means, since Hilbert talks about it in his “Mathematical Problems” lecture.

I also love how the wikipedia article talks about “debunking illogical circle-squaring theories“. I guess we have perpetual motion theories still! Apparently “squaring the circle” is also an idiom for “trying to do the impossible.”

Oh, and there’s a lady mathematician who formed an integral part of the 10th problem, which is the one people go gaga about trying to figure out if Hilbert would have approved of (the solution to). That’s the one where we learned that we cannot know the solution

I also thought it was cool how the work to solve this problem built up over two decades. (and one of the four contributors was Julia Robinson, who had a J.R. hypothesis that wasn’t proven until 20 years later).

Oh, and then we read Turing’s paper, the one with That Word. Entscheidungsproblem. Anyhow, I started browsing briefly and decided I really still have no idea what it means for something to be computable. The wikipedia article states “Computability is the ability to solve a problem in an effective manner”. Really, wikipedia? It’s probably similar to the question of what counts as a robot, I suppose. Anyhow, that article briefly mentions both automata (heh, sounds like automaton) and also hypercomputability. Such a fun word.

Okay, now back to fixing the problem of why my alarm clock app, Timely, no longer goes off reliably :((((((((((( I thought Timely might have updated, but it says the last update was in September of 2017. So maybe it’s some Tmobile or Android or Samsung update that borked my alarm clock 🙁 I’ll try the only other version of Timely, a 2015 update, and report back.