In this post, we
- Install gitlab omnibus and enable mattermost
- Get mattermost to accept gitlab credentials
- Use ports and a second domain name we have full control over to get around not being able to install mattermost in a subdirectory
- Solve an annoying “Failed to upgrade websocket connection” error in Mattermost that means it doesn’t have real-time services
- Learn how to purge mattermost data
Specifically, we have two domain names.
a) organizational-domain.com (in our case, a .edu domain), which all our files will be created on
and
b) your-domain.com (in our case, a domain we registered separately through godaddy)
To resolve that we a) cannot create subdomains on the organizational domain, and b) must install mattermost on a subdomain, not a subdirectory, we will create subdomains on your-domain.com and point them to ports on the organizational domain
git.your-domain.com –> http://organizational-domain.com:8001
mattermost.your-domain.com –> http://organizational-domain.com:8007
Install Gitlab Omnibus, Community Edition, for the first time
(Note: Omnibus i think just refers to the official latest and greatest gitlab release)
0a. Add gitlab repository as per https://about.gitlab.com/downloads/#ubuntu1604
0b. sudo apt-get install gitlab-ce
If not first time: Uninstall and Purge Gitlab Data
https://gitlab.com/gitlab-org/omnibus-gitlab/blob/6-9-stable/README.md#uninstalling-omnibus-gitlab
1. sudo gitlab-ctl uninstall
Stop gitlab processes
2. sudo gitlab-ctl cleanse
Remove all omnibus-gitlab data
3. sudo apt-get remove gitlab-ce
Reinstall Gitlab
4. sudo apt-get install gitlab-ce
5. sudo gitlab-ctl reconfigure
Re-configure Gitlab
6. sudo vi /etc/gitlab/gitlab.rb
6a. external_url “http://organizational-domain.com:8001″
6b. mattermost_external_url ‘http://organizational-domain.com:8007′
(Note: these ports, 8001 and 8007, were arbitrarily chosen and just needs to match Apache’s configuration in /etc/apache2/sites-enabled/gitlab.conf & /mattermost.conf)
7. sudo gitlab-ctl reconfigure
8. Go to http://git.your-domain.com
8a. It will ask you to set a password
8b. Sign in to gitlab, the username is root and you just set the password
Reconfigure Mattermost
9. Get mattermost to accept gitlab’s single-sign-on
9a. On git.your-domain.com, go to Profile Settings > Applications
Add new applications
Name: Mattermost
Redirect URI:
http://mattermost.your-domain.com/signup/gitlab/complete
http://mattermost.your-domain.com/login/gitlab/complete
Save Application
You will get an Application ID and Secret, which you will use in the next step.
9b. Edit /etc/gitlab/gitlab.rb, uncomment and fill out
mattermost[‘gitlab_enable’] = true
mattermost[‘gitlab_id’] = “12345656”
mattermost[‘gitlab_secret’] = “123456789”
mattermost[‘gitlab_scope’] = “”
mattermost[‘gitlab_auth_endpoint’] = “http://git.your-domain.com/oauth/authorize”
mattermost[‘gitlab_token_endpoint’] = “http://git.your-domain.com/oauth/token”
mattermost[‘gitlab_user_api_endpoint’] = “http://git.your-domain.com/api/v3/user”
(Note to self: make sure to put “git.your-domain” and not “gitlab.your-domain” to keep everything consistent)
10. sudo gitlab-ctl reconfigure
Test it!
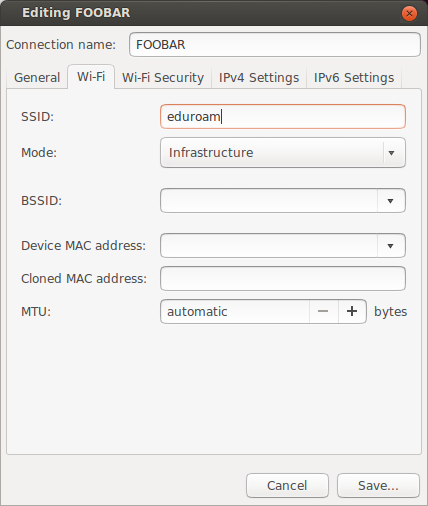
11. On gitlab, register a non-admin account
Foobar
foobar@mailinator.com
asdf1234
12. On gitlab, sign out as root and signin as foobar
13. Go to mattermost.your-domain.com
13a. Create an account with Gitlab Single Sign-On
13b. Authorize
14. Create a new team
15. Team Settings > Allow any user with an account on this server to join this team: Yes
16. Make sure real-time communications work: open a new tab and make sure you don’t need to refresh to see the chats update
Fin.
===============
Alternative way to purge Mattermost data:
Getting the Mattermost CLI to work in Gitlab Omnibus
The Mattermost CLI is documented here https://docs.mattermost.com/administration/command-line-tools.html
However as we are using Mattermost as part of Gitlab, it is a bit finicky [1] and we must use this shell script:
$ sudo vi mattermost.sh
#!/bin/sh
cd /opt/gitlab/embedded/service/mattermost
sudo -u mattermost /opt/gitlab/embedded/bin/mattermost -config=/var/opt/gitlab/mattermost/config.json $@
$ sudo sh mattermost.sh -help
(Just to check that the script is working)
Now, to delete a team:
$ sudo sh mattermost.sh -permanent_delete_team -team_name=”first slack team”
Have you performed a database backup? (YES/NO):
YES
(Otherwise it will abort)
Fin.
[1] Credit to: http://forum.mattermost.org/t/where-to-find-mattermost-after-installing-gitlab-omnibus/175/7
===============
Troubleshooting: Misc
sudo cd` fails; switch to interactive mode using `sudo -i` and then run your commands. (eg `cd`)
sudo service apache2 restart
a2dismod & a2enmod
Troubleshooting: Log Locations
sudo gitlab-ctl tail
sudo tail -f /var/log/gitlab/mattermost/mattermost.log
sudo tail -f /var/log/apache2/error.log
sudo tail -f /var/log/gitlab/nginx/gitlab_mattermost_access.log
sudo tail -f /var/log/gitlab/nginx/error.log
Troubleshooting: Firewalls?
$ sudo netstat -plnt | grep :8001
(you should see
tcp 0 0 0.0.0.0:8001 0.0.0.0:* LISTEN 12668/nginx
Else, if the port isn’t in use, you’ll see nothing)
or
$ nc -l 8001
( you should see
nc: Address already in use
Else, you’ll see nothing)
If the port is open and not firewalled, you should be able to talk to yourself
In tab one: $ nc -l 8002
In tab two: $ nc organizational-domain.com 8002
Whatever you type in one tab should show up in the other
Notes: Apache Configuration to avoid Mattermost websocket errors
For proper websocket updating, you must enable
$ sudo a2enmod proxy_wstunnel
(Just in case, though gitlab install should have enabled this:
sudo a2enmod proxy_http)
$ sudo service apache2 restart
/etc/apache2/sites-enabled$ sudo vi mattermost.conf
<VirtualHost *:80>
ServerName mattermost.your-domain.com
ServerSignature Off
ProxyPreserveHost On

<Location />
Require all granted
ProxyPassReverse http://127.0.0.1:8007
ProxyPassReverse http://mattermost.your-domain.com/
</Location>
RewriteEngine on
RewriteCond %{REQUEST_URI} ^/api/v3/users/websocket [NC]
RewriteRule /(.*) ws://127.0.0.1:8007/$1 [P,L]
RewriteCond %{DOCUMENT_ROOT}/%{REQUEST_FILENAME} !-f
RewriteRule .* http://127.0.0.1:8007%{REQUEST_URI} [P,QSA]

</VirtualHost>
The bolded lines essentially catch requests by Mattermost to the websockets API and makes sure they are redirected to ws://
(Otherwise you will not get real time updates and will get lots of ” Failed to upgrade websocket connection” in the Mattermost log, var/log/gitlab/mattermost/mattermost.log)
Credit to http://serverfault.com/questions/616370/configuring-apache-2-4-mod-proxy-wstunnel-for-socket-io-1-0/etc/apache2/sites-enabled/gitlab.conf is identical, minus the two bolded websocket lines; and with URL and port changed.
<VirtualHost *:80>
ServerName git.your-domain.com
ServerSignature Off
ProxyPreserveHost On
<Location />
Require all granted
ProxyPassReverse http://127.0.0.1:8001
ProxyPassReverse http://git.your-domain.com/
</Location>
RewriteEngine on
RewriteCond %{DOCUMENT_ROOT}/%{REQUEST_FILENAME} !-f
RewriteRule .* http://127.0.0.1:8001%{REQUEST_URI} [P,QSA]
# needed for downloading attachments
DocumentRoot /opt/gitlab/embedded/service/gitlab-rails/public
</VirtualHost>
Credit to https://kevingoedecke.me/2015/09/17/setup-gitlab-on-debian-7-with-existing-apache-webserver/ &
Fin.